*This post contains some Amazon affiliate links. As an Amazon Influencer, I earn from qualifying purchases. Please see my full Disclosure Statement.
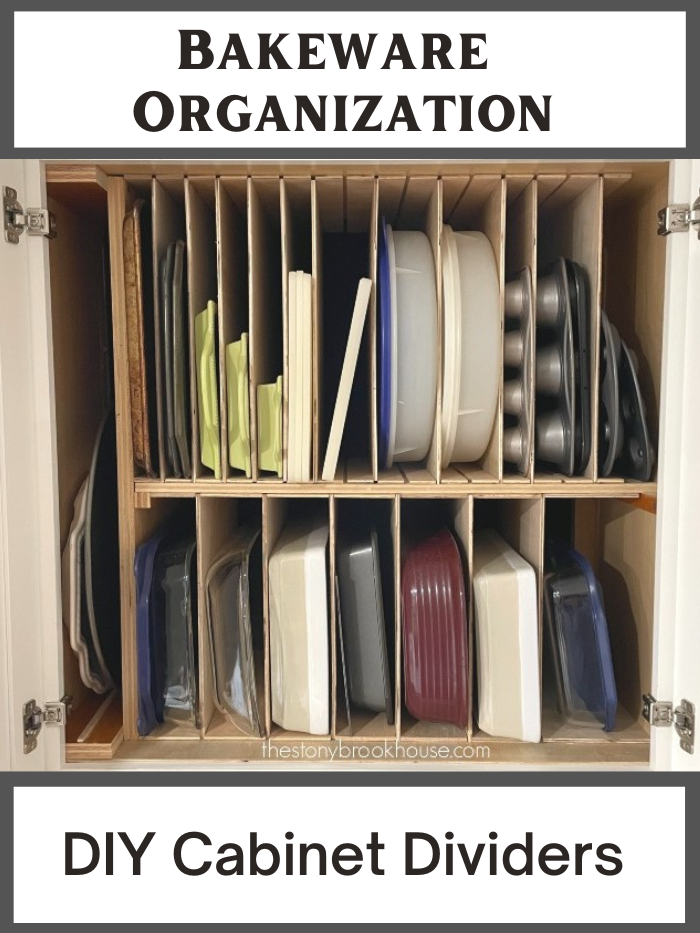
I've wanted one of these bakeware organizers for as long as I can remember! So, it was of utmost importance that this little project was going to happen in our kitchen remodel!
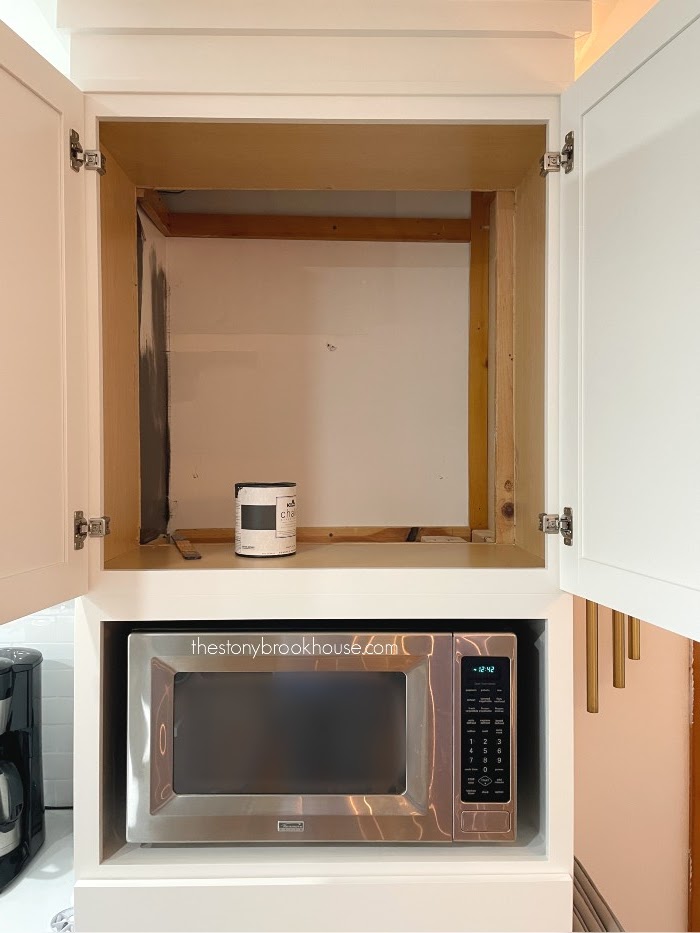
This 'tutorial' is going to explain how we created this organizer, instead of a step by step with measurements and such. You can create these cabinet dividers in any size cabinet. I chose this 30" wall cabinet in our microwave cabinet tower.
This was the start of building this whole unit. To see the entire process, just click over to Where To Put The Microwave.
As you can see, it's just a standard wall cabinet that we blew out the back and made it look like a full solid unit.
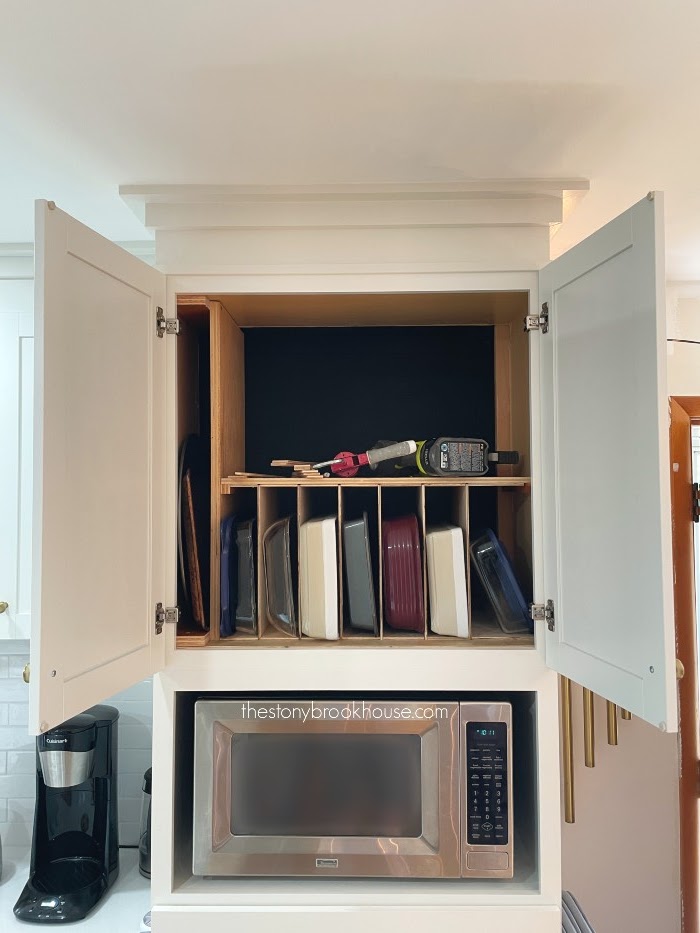
So, this is where I wanted to put a bakeware organizer with DIY cabinet dividers. I just knew it could hold 90% of all the bakeware I have. To hide all of the cabinet supports, I painted the entire back and sides black with some chalk paint I had left over from another project. It doesn't have to be perfect and pretty, just give the illusion of a black hole.
I was surprised at the difference! First thing we did was cut a piece of underlayment for the base of the shelf, because there really wasn't anything past the 12" cabinet. Then we placed spacers on one side of the cabinet.
I needed a space for extra tall items, like my turkey platter (that's been in my family forever, and I'll never get rid of even if I don't use it often) and my pizza pan. For the spacer, we used leftover cabinet door wood from the old kitchen. I love that we've incorporated some of the old kitchen in the new one.
Next, we measured and cut a board (old cabinet wood) to the height of the cabinet and attached it to the spacers. Then, we added a shelf to the cabinet with supports. To me, it just made sense to make a 'double decker' organizer to maximize the entire space.
All of this bakeware plus some, needs to fit into this cabinet! We measured the depth of the baking pans and all of them were under 3 inches. So, for the bottom shelf we made the spacers 3 inches apart. I wanted the heavier items on the lower shelf, so that they were easier to access. The lighter items can go on the top shelf.
From there, it was pretty easy. Just cutting the divider spaces and dividers themselves.
The dividers just slide in and out. Okay... I'm loving this!!! The last space on the right was a bit larger. We ended up storing our large electric griddle there (not shown).
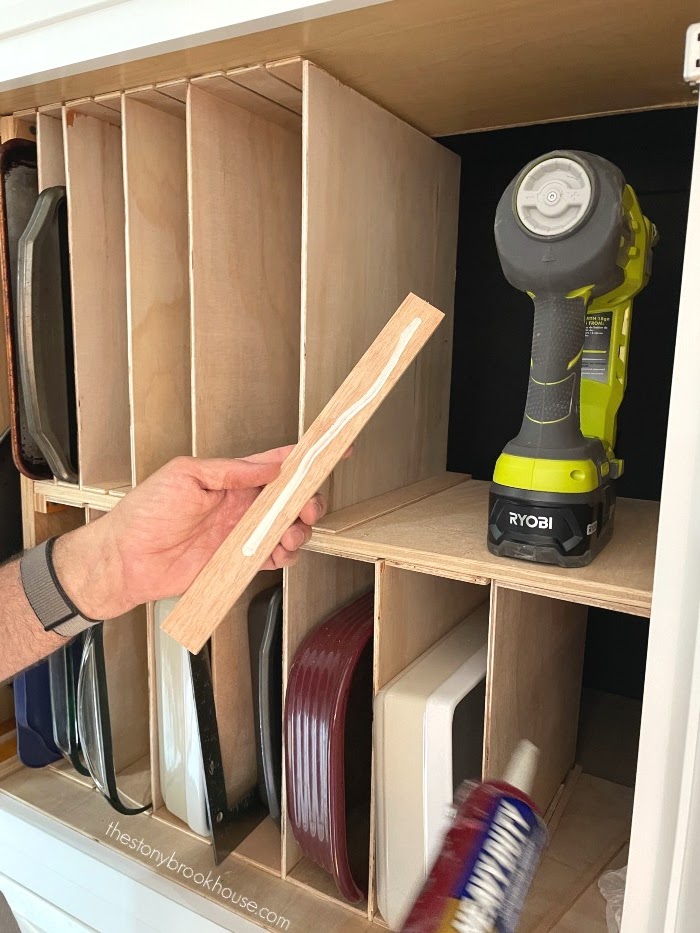
Here's how we did it. I cut 3" spacers for the bottom shelf and 1.5" spacers for the top shelf. The dividers were the height of each shelf. We used underlayment for all of it. Which worked out perfect! Underlayment is pretty cheap, around $20 for a 4'x8' sheet of it. We just ripped it to size on our table saw.
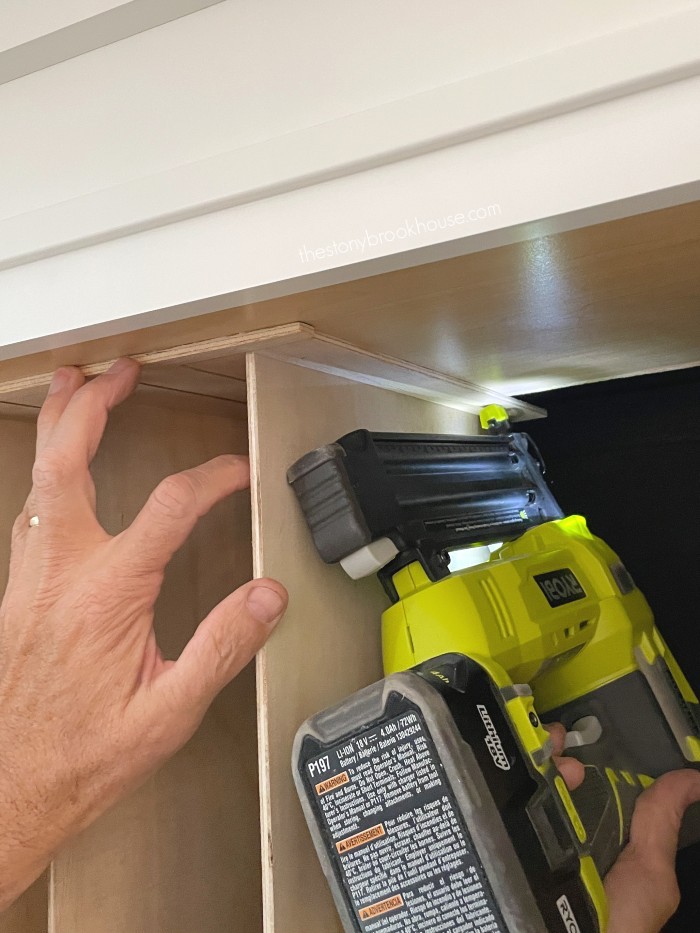
Hubby applied Liquid Nails to the spacer and nailed it in place with our handy dandy Ryobi Cordless Nailer. He used a divider as a guide for the next spacer. It went pretty fast!
Because we made the spacers smaller on top shelf, we can adjust each slot for the width we want. You can totally customize it for whatever you need! I absolutely love it! It's soooo much better than stacking them in a cabinet.
Let me know if you have any questions!
You can always email me at
thestonybrookhouse@gmail.com
Blessings!
Lori
Here are some links to see all the progress we've made on our kitchen renovation.
1960 Kitchen Remodel Plans
Kitchen Cabinets Going In
More Kitchen Demo
Kitchen Update - Ceiling Paint
Building A Shiplap Island
Why I Chose Quartz Counters
Where To Put the Microwave?
Building A Stove Hood
Fridge Enclosure
Kitchen Tile Backsplash
Bakeware Organizer
How We Built All These Drawers
Installing Open Shelves On Tile Walls
Installing LED Undercabinet Lights - No Soldering








Very nice! A few tips for y'all (or future readers):
ReplyDelete- For the vertical dividers, consider cutting out some of the material in the front middle to make it easier to grab stuff in the slots.
- Get some iron-on edge banding to cover the plywood edges and make it look a little nicer (yes, I know it's a utility cabinet, but edge banding is relatively cheap.
- Cutting and gluing spacer works just fine, but if you have a handheld router or table saw and dado blade, you could get a slightly thicker sheet of plywood and cut dados/grooves in the plywood to slide the divers in and out of.
Even without doing anything different, it still looks great and super practical!
Thank you! Yes, there are different ways to achieve the same result. We really like how ours turned out! Thanks for your input!
DeleteI really want to try this with one of my cabinets. Thank you for the great post!
ReplyDeleteHi Vicki! Yes! Do it! It is a game changer! I absolutely LOVE it!
Delete