*This post contains some affiliate links. Please see my full Disclosure Statement.
I will admit right up front that tiling and grouting our new master bath shower completely intimidated me... Hubby and I had never done it before and we weren't sure we could, but we were willing to give it a try.
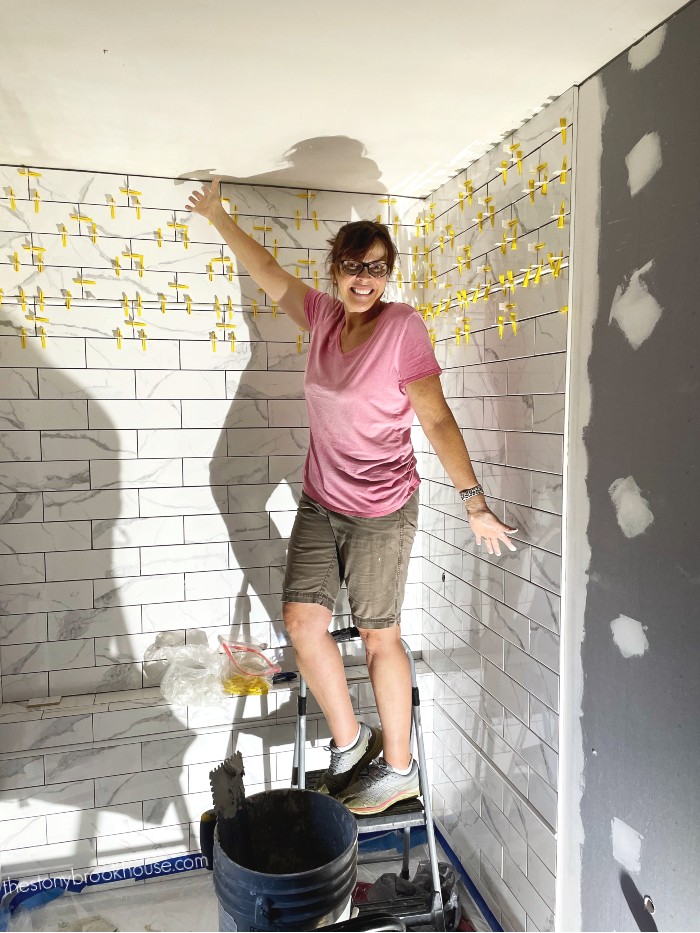
Hubby tiled about the first 4 or 5 bottom rows. Then the weekend was over and he had to go back to work. I wanted to keep working on this. It was going to take forever if I wasn't willing to jump in and give it a go myself.
Hubs was confident I could do it. I need to try. I'm so glad I did. I learned so much!
There's a lot to consider when taking on this tile job and I did a post on all the things to think about. What To Think About Before You Tile A Shower.
So, if I can do it, so can you! I would suggest reading my posts and watch a ton of YouTube!
To see the Master Bath completely finished, check out Master Bath Reveal!
Here I compiled 7 things I learned from tiling our shower.
1. Always, always, always waterproof!!!
Some say you don't need to apply a waterproof membrane if you use a cement board or Hardie backer board. Ummm, no! Water damage is the worst to repair. Better safe than sorry. I applied 4 coats of Aqua Defense. There is another product call Red Guard that is just as good.
2. Read all the directions on the bags of mortar and grout.
I almost made a huge mistake when I went to grout. I thought I could just slather the grout on the whole shower and then go back and wipe it off. Um, no. This was quick setting grout and I would have ruined the whole tile job if I had done that. The grout would have dried and I wouldn't have been able to get it off the tiles. I would have cried!
So, I quickly switched gears and decided to do small batches. Turned out to be a great decision!
3. Work in small batches.
If you're a professional then you can slap all that mortar on and tile away. We are not, so working in small batches made it more manageable. I wasn't as worried about the mortar drying.
Like I said in #2 I also grouted in small batches. It's a lot less stressful.
4. Use a laser level.
This is the one we purchased on Amazon. Laser Level. This was the best thing to use. You want to make sure the tile rows are even. It can easily start to slant if you aren't careful. In my opinion, it's a must if you're going to tile, especially a shower.
It took all the guess work out of whether your rows were straight.
It was easy to put it on the tripod and raise it with each row. When it got too tall, I put the tripod on chairs. 😁
5. Use leveling tile spacers.
This is the type we used. Tile Spacers. (They are a lot cheaper on Amazon. We purchased ours at Home Depot.) They cost a bit more, but are soooo worth it. Near the bottom of the shower, we didn't use them between the tiles in the row, just above and below each tile. Well... some of those tiles are not quite as flush with the surrounding tiles. Some edges stick in or out a bit too far. (No one is going to notice it unless we show them.)
Once I started using them in between every single tile they were all level with each other. They are all flat and flush against the wall and spaced correctly.
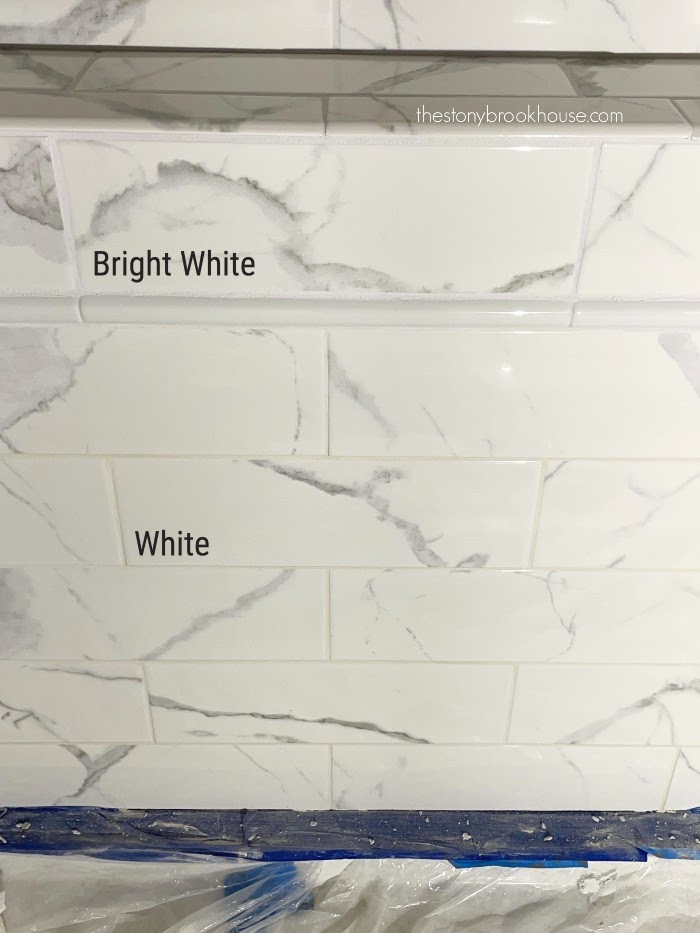
5. All whites are not created equal.
The tile we chose is very white white, not creamy white. So, when we chose the grout, we chose white. It said it was white.
Can you see the difference in the photo? That grout was not true white white. It was creamy white and it looked dirty against the super white tile. UGH! I was not a happy camper!
I went back to Lowes and the helper in tiling showed me the bag of bright white. That other bag should be labeled creamy white. Seriously!
I ended up going over the creamy white just to see if any of the bright white grout would stick. It did! You can't really even see any difference now. 👍
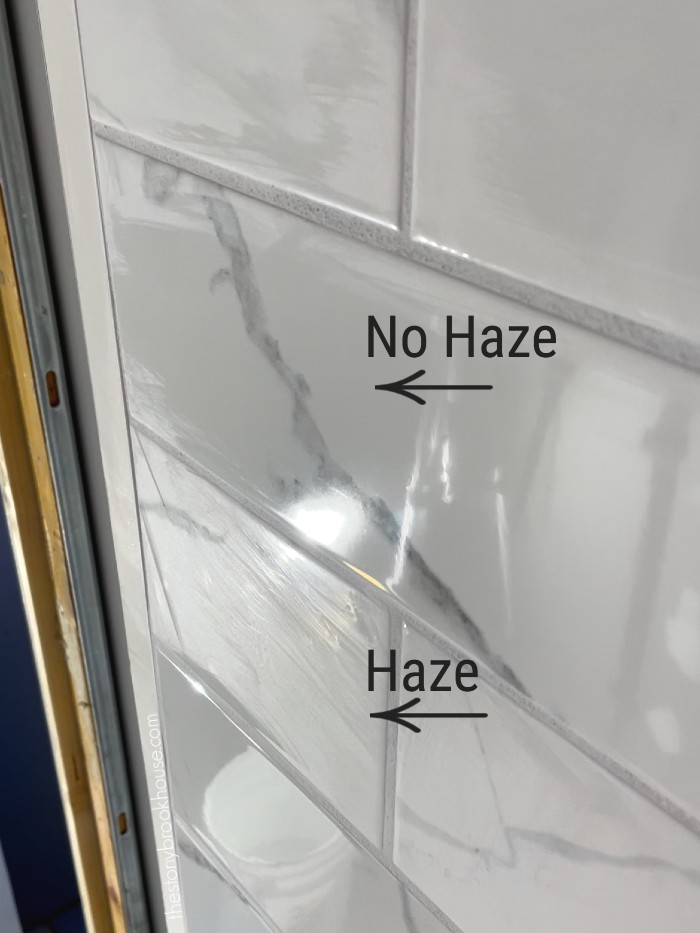
6. Don't let the haze stay... it'll be a bear the next day!
With the quick setting grout, I took care of the haze with each batch. It really wasn't that hard to deal with when you get to it quickly. I just wiped off the excess. Then with a clean paper towel, buffed it to shine.
7. I did it! Was it hard? Somewhat. Did I learn? Yes.
But I did it! I'm really proud of the shower!
I don't think I want to tile showers for a living. But you can do hard things. I had never done this before. So, if I can do it, so can you!
Blessings,
Lori


Well done!! Love the tile you chose, so classy!
ReplyDeleteThanks so much, Cristina!
DeleteGreat job! I'm about to tile my range backspash. Much smaller job than a shower, but I've still been procrastinating! You've given me the courage to give it a go! Thank you!
ReplyDeleteHi Donna! Thanks so much! You can do it! I'd love to see it finished!! :)
DeleteBeautiful!
ReplyDelete