*This post contains some affiliate links. Please see my full Disclosure Statement.
This is how we've been charging all of our devices since we moved in... nice, right?!
We just didn't know the best place to plug in and charge everything. I just couldn't take the cords anymore! If you know me, I want ALL the cords hidden if at all possible!
Searching Pinterest for inspiration... I figured out that I needed some kind sort of box with either a lid or a drawer. Now, I was on to the hunt... I went to 2 local thrift stores and Goodwill came in for the win!
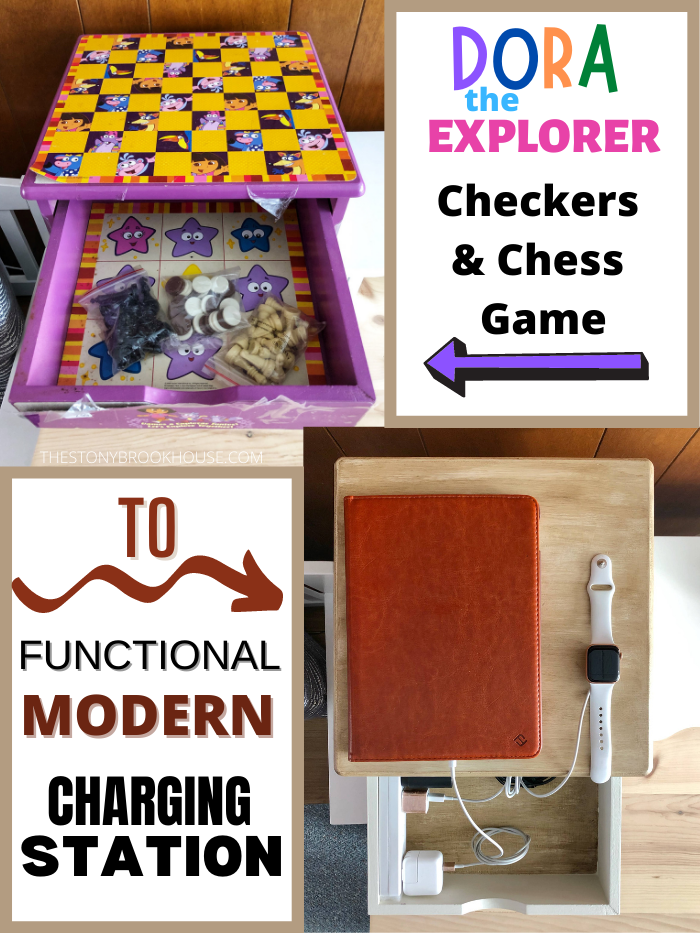
I scored this funky little Dora the Explorer checkers and chess game for $2.99!
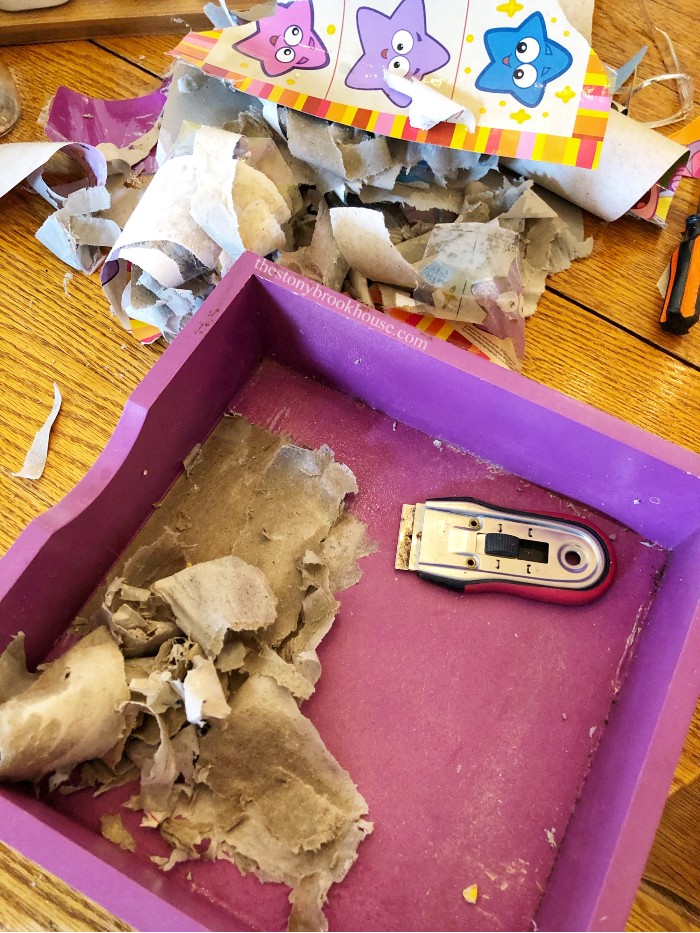
Not that it could've been used as that, because the packing tape all over it ripped the cardboard stickers right off. 😜 But, this was PERFECT for what I needed!
I ripped and scraped all of the cardboard stickers off.
Then I mixed up some chalk paint with some paint samples that I had on hand. Here's my DIY Chalk Paint Recipe.
What's so nice about chalk paint is, you don't have to sand or anything. It sticks like glue and has a nice matte finish.
The coverage was so good, that I only needed 2 coats! Sweet!
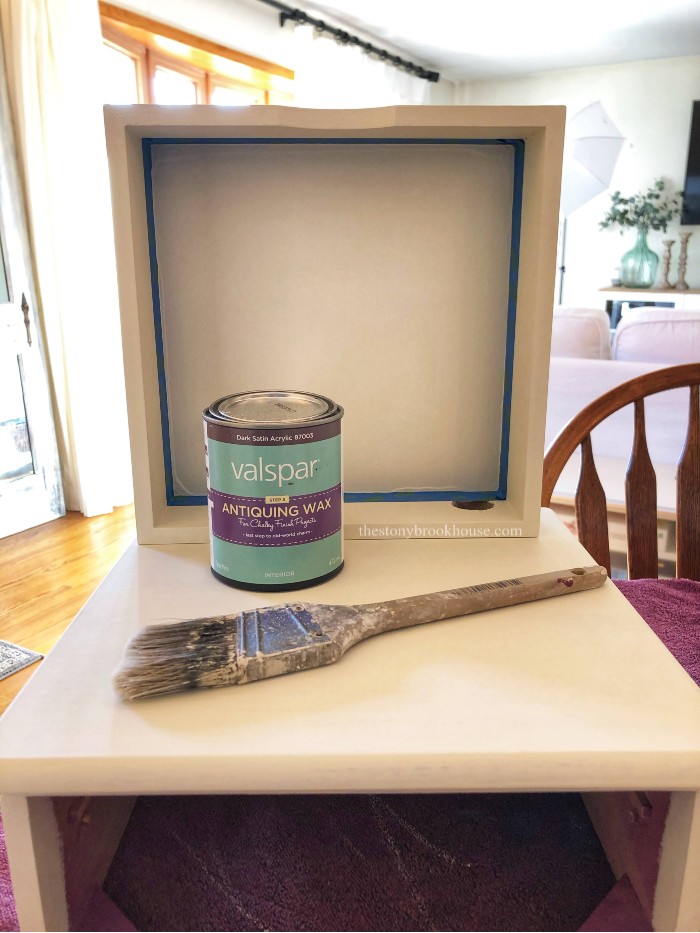
Once the entire thing was painted, I decided to accent the top and inside the drawer with an antiquing wax.
I really like Valspar's Dark Antiquing Wax. It's available on Amazon, or you can pick it up at Lowe's like I did.
You just brush it on and that's it. It has such a nice hard finish. You can do one coat or multiple, depending on how dark you want it. I was going for a lighter look.
I taped off the inside of the drawer and just brushed it on. For a lighter look, I barely dipped my brush into the wax and then dabbed most of it off on a paper plate. If I needed more, I used what was on the paper plate before dipping back into the can.
Oh, the satisfaction of peeling off the tape. I love it when the line comes out crisp. 😍
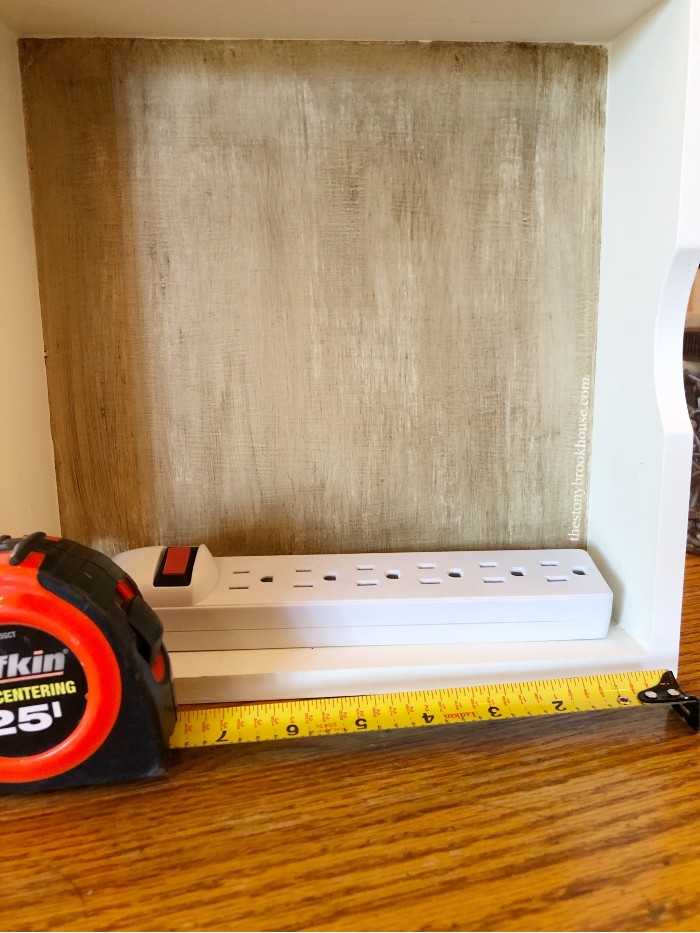
I forgot to mention, that Hubby helped me drill a hole in the back of the drawer and the box to fit the power strip cord through. You kind of need power for a charging station. 👍
So, the last step was to install the power strip. I had this one in our box of power strips. Yes, we have a box of them.... When we moved, I collected them from all over the house and packed them all together!
This one is nice because it has a long 6ft. cord. Here's one like it on Amazon, Power Strip.
Of course, you need to make sure it fits your drawer. Yes, it fits... just barely!
Now to attach it.
Finding the right screw, the right length, and the right size head on it. 👌
Then you just plug it in and set it up! We are thrilled with ours!! Everything is nice and tidy. 😍😍😍
Soooo nice! I love the drawer and how we can feed cords through to set our iPad, iPhone and watch to charge on top.
This is perfect! So much better!
Blessings!!
Lori


Did you sand the paint off of the top?
ReplyDeleteHi Jordan! Nope! When you use chalk paint, you really don't have to sand a thing! It sticks like glue!
Delete