Then one day, Hubby and I were walking into Home Depot and we saw these fence pickets... Hmmm...
This was exactly what I was looking for. I wanted wood that was treated for outdoors. I wanted it to be light weight, and... they were only $1.16 per picket! What?!?! These were perfect! So we loaded up a bunch.
Each window box only needs about 4 pickets to make, so that makes it under $5 for each one! What a deal!
The top and bottom rails are also made with the pickets. We just ripped a picket in half with the table saw. You can see that some are already cut in this pile of fence pickets.
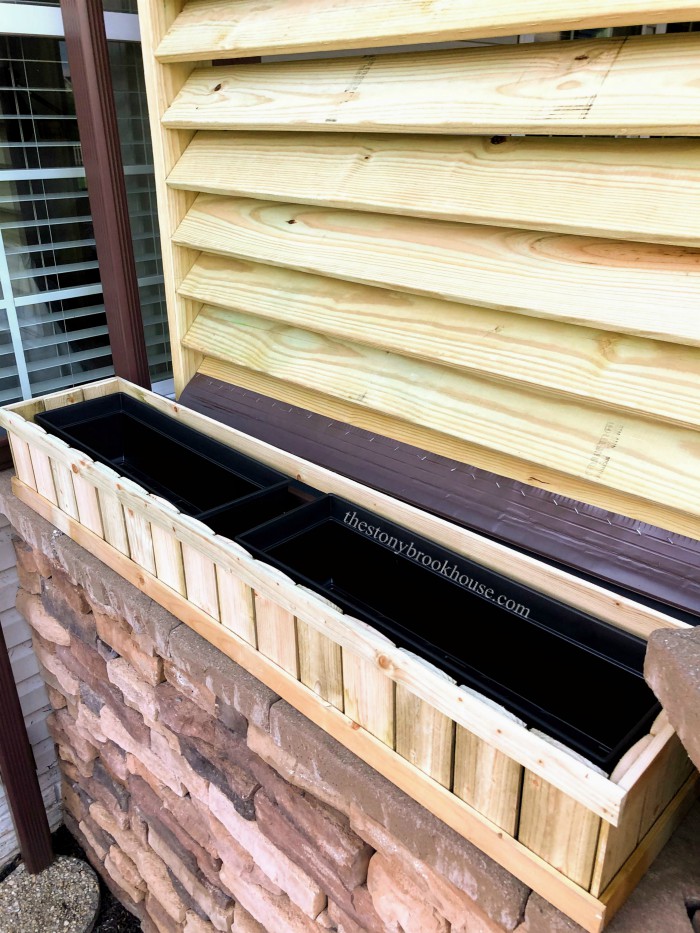
The other thing about these window boxes, is that they are actually 'faux window boxes'. They cover a plastic window box to make them look like they are wood. They also don't carry the weight of the soil and plants.
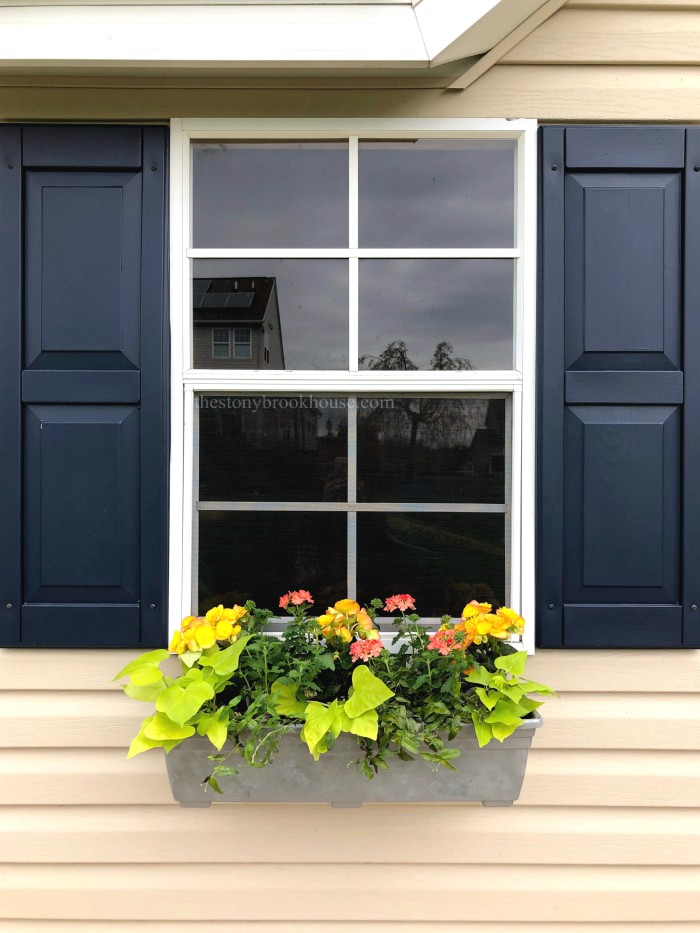
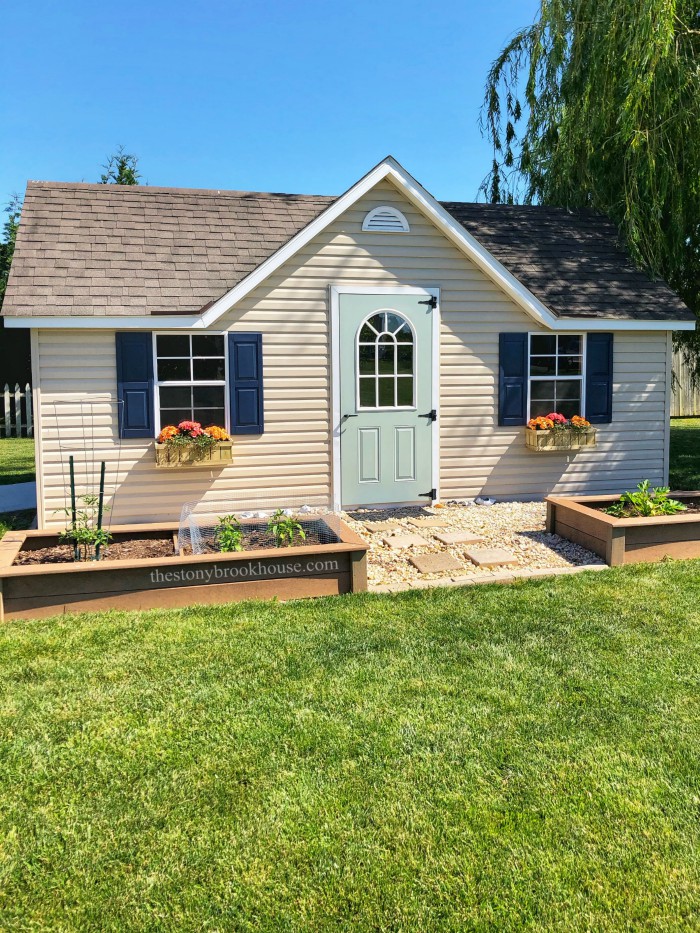
Our shed has had window boxes on it for as long as I can remember.... I just use the plastic ones with brackets to hold them. I have to put them away every winter, because of the extreme cold we get here.
I even did a post on, How To Paint Plastic Window Boxes, like this in the photo below.
Now, I can leave the wood cover up and just pull out the plastic window boxes during winter. I love this!
I made a large wood window box for in front of the privacy screen we built a few weeks ago. It covers the rain gutter and holds two 24" plastic window boxes. This came out so pretty, you can see it all dressed up with flowers, if you click on over to How To Build A Privacy Screen.
Okay, let's get into this build.
Supplies
4 - Fence Pickets
5/8" nail brads for nail gun
4 - 3" Screws
4 - 1 ½" Screws
Here are the measurements for the wood window box. This should cover a standard 24" plastic window box.
Length - 26 ½" long
Height - 7 ¾" total
Sides - 9 ¾" total
First, you need to rip 2 pickets in half lengthwise. This is for the top and bottom rails. Then cut 2 rails at 26 ½" long. Then cut the side rails, you will need 4 at 9 ¼" long.
Next, cut your pickets. I cut mine at 7 ½" long. I wanted them long enough to cover the brackets that hold the plastic window boxes. You can make them shorter or taller, whatever you prefer.
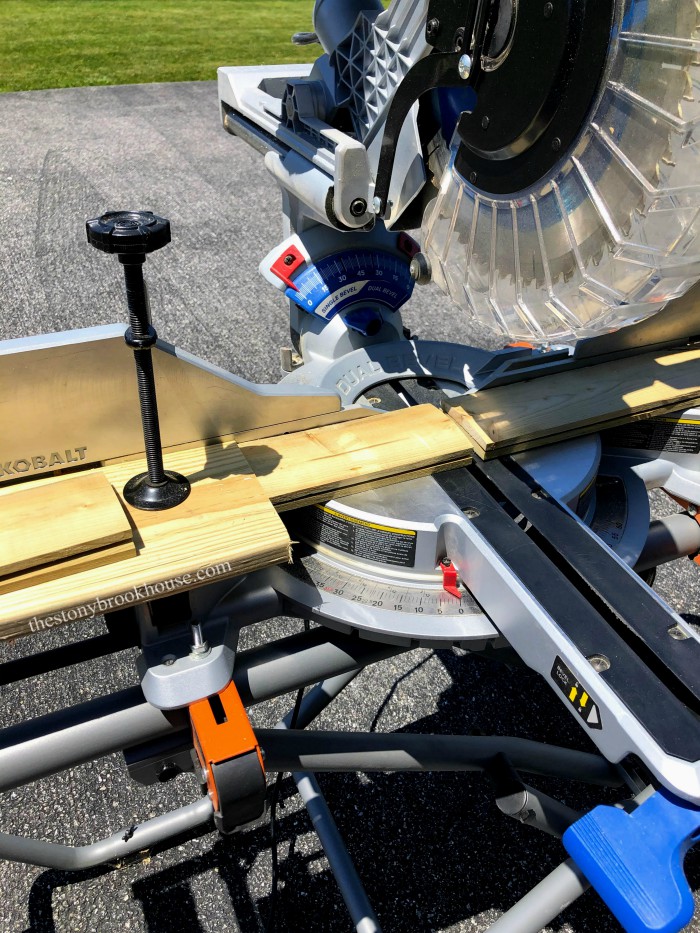
I set up a fence on my miter saw which made it soooo easy to cut all those pickets! Why have I never thought of this before???
Do you see how I have a board secured with that black clamp? I measured to make sure that it would cut 7 ½". All I have to do, is butt up my board to that board and cut... a perfect 7 ½" cut every time!
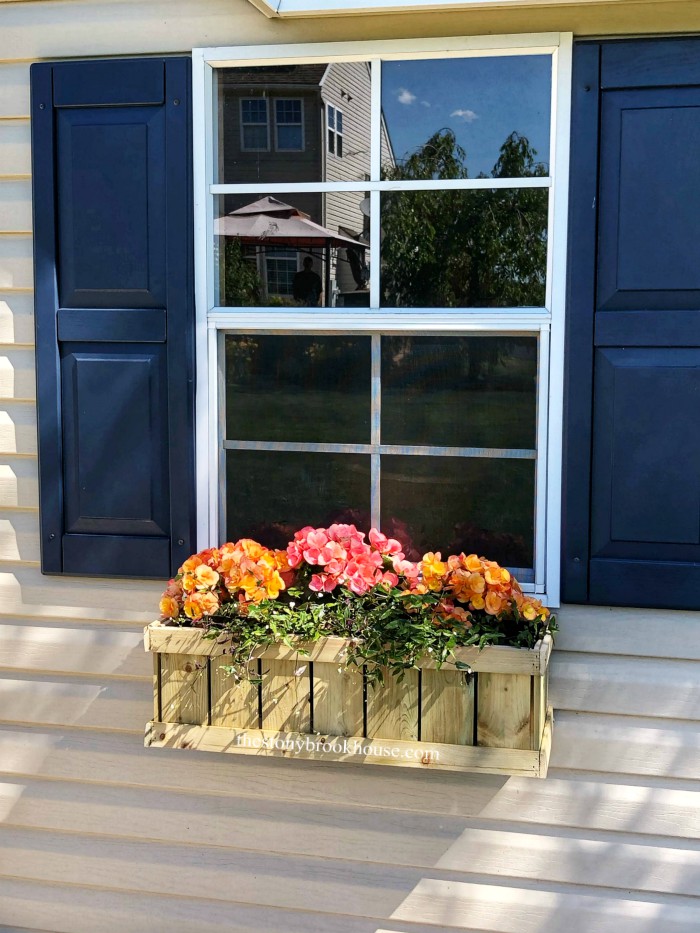
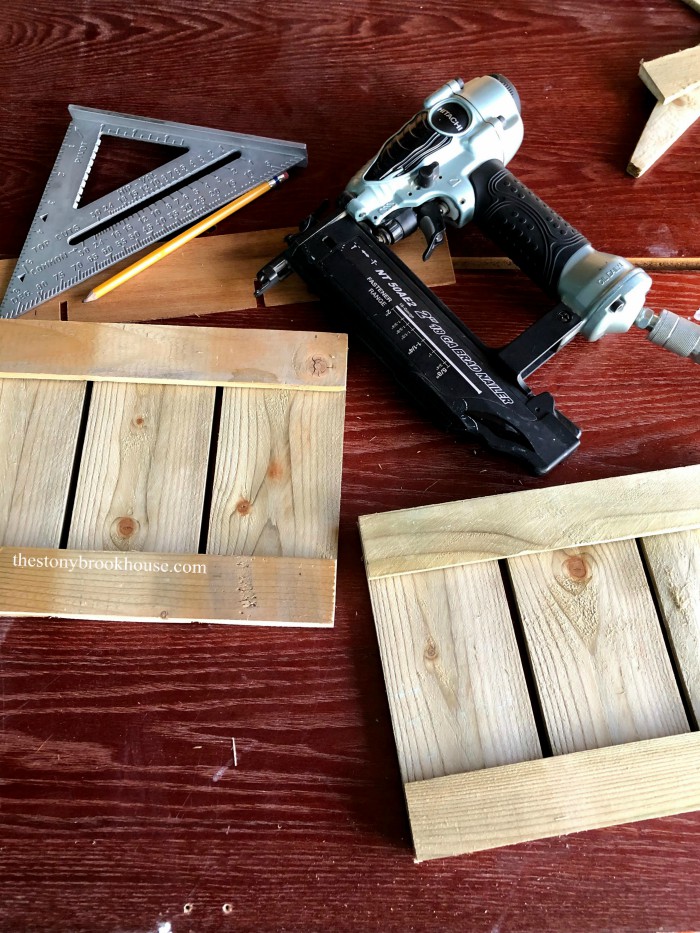
Now that the pickets are all cut, we just have to nail this baby together. You will notice with these pickets that one side of them is flat and the other has a slight curve to it. I laid the flat side down.
You can see that more clearly in this finished photo of the window box.
For the front panel, line up the top and bottom rail with the pickets. From each end, measure off 1 inch. This is where your first picket will start and end. I used a piece of scrap underlayment that was around ⅜" thick as a spacer between pickets.
I started at each end and worked my way to the middle. I set them up first and tried out the spacing to see how it would work. It happen to work out perfectly! It was a tiny bit off in the middle, but it was easy to adjust. You can decide how much space you want between each picket.
For the side panels, you will start at each edge, with no space on the ends. Two full pickets will fit for the side panel. The last picket you will need to cut off approximately ¾ of an inch. Remember to make each side opposite of each other so that the picket that is ¾" smaller is at the backend, where it will be attached to the wall.
Now we just need to nail them together. Stand them up on their sides and place the corners together. Then nail them. It's a bit tricky, because the wood isn't super thick and you want to make sure you are nailing into the wood. You can do it!!
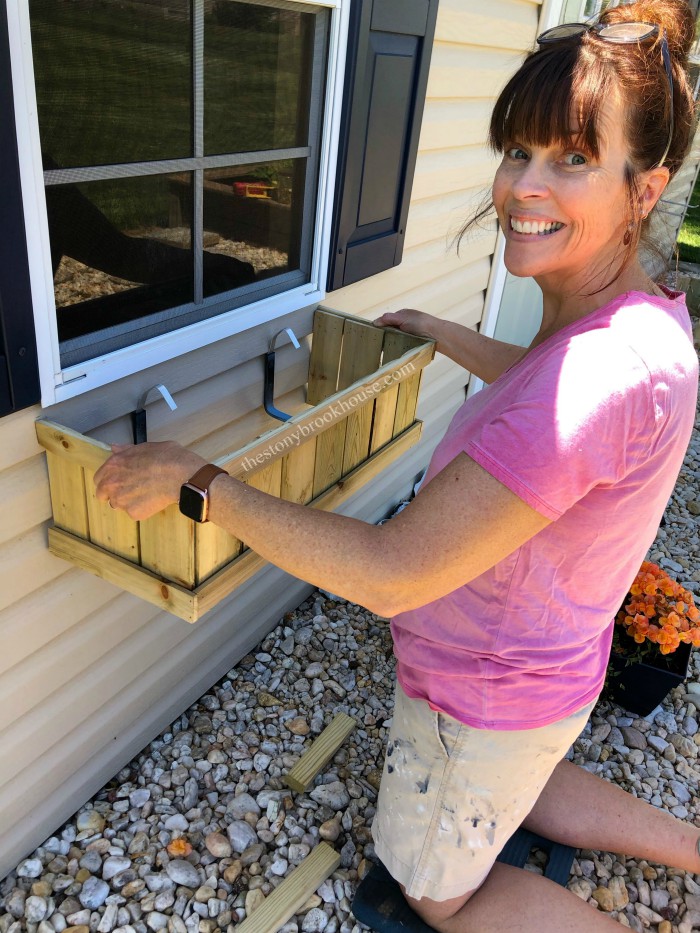
Then your window box is finished! Here I am marking where I want to attach my supports for the window boxes.
You can see the brackets that hold the plastic window boxes. These wood boxes ones will go around them.
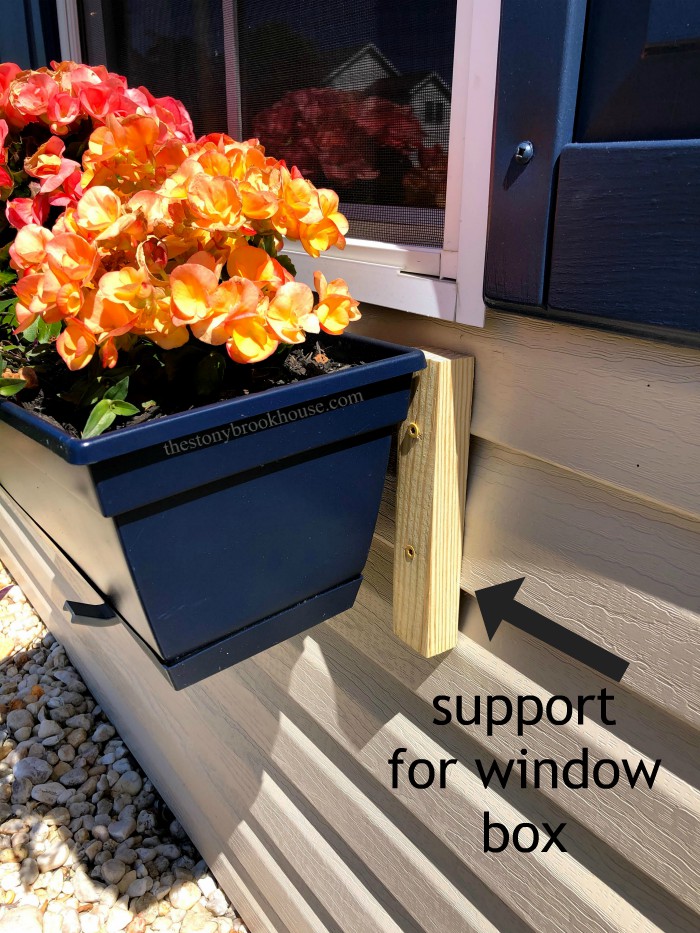
In order to attach the wood boxes to my shed, I found some scrap wood and cut some blocks. They were around 7 ½" long and 2" wide. I predrilled the blocks and screwed them in with 3"screws.
The last step is to screw the sides into these wood blocks. I predrilled the holes in the window box, I didn't want the wood to split. Then I just screwed them in with 1 ½" screws. Done!
They look so cute. I haven't decided, but I might stain them next year. We'll see....
I also painted my shed door a new color to match the front door. I just love how the front door came out, you can see that here at, Easy Front Door Makeover.
Blessings!









Oooo, these look like they would be a fun class project!
ReplyDeleteHi Liberty! Yes, they probably would be! Great suggestion!
DeleteThis comment has been removed by a blog administrator.
ReplyDeleteThis comment has been removed by a blog administrator.
ReplyDelete