Not at all....
*This post contains some affiliate links. Please see my full Disclosure Statement.
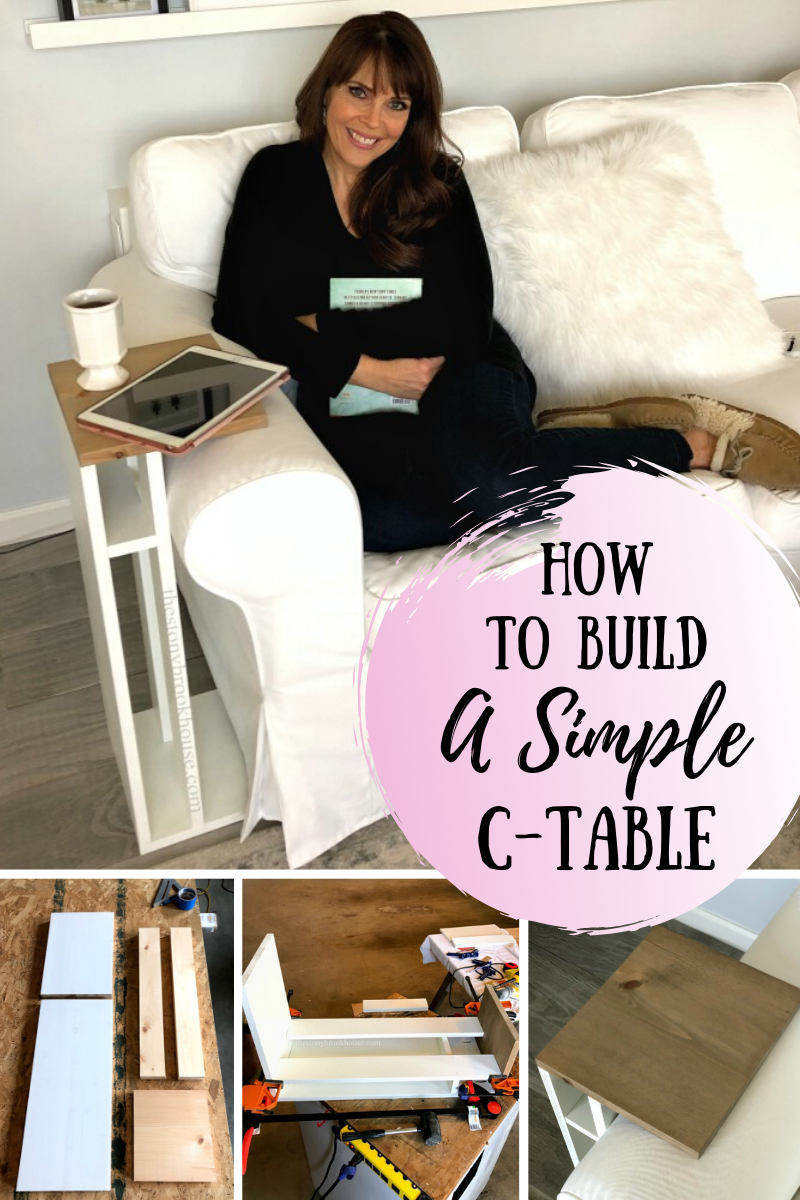
This little table makes life so simple, because now I have a place to set not only my coffee, but my phone or tablet too! In this post, I'm going to show you...
How To Build A Simple C-Table
I've already decided, I'm going to have to make a couple more of these, because they are just a necessity! They sit right next to you whether you are in a chair or on a couch.
I wanted to make 2 of these tables for the chairs in our living room. So, why am I showing it to you next to our couch? Well, because I haven't recovered the chairs yet, and the couch looks so much prettier. 😍 And guess what!? I was able to make them both from scrap wood I had in the garage, which is always a plus!
The most important thing before you get to cutting your wood, is to determine the height you want your C-table to be. I wanted these C-tables to hit right above the arm of a chair or sofa, and not to stick out into the seating area of the chair. So, it's important to consider where you want your table and the height you need. (Now, you can see why I need to recover these chairs 😣)
Personally, I didn't want a large surface for my C-tables. I wanted just enough space to place a drink and a phone or tablet. In this photo, I cut enough wood for 2 tables. Here are the dimensions for our tables:
Of course we scoured Pinterest looking inspiration. We didn't see exactly what we wanted, so Hubby drew up some simple plans.
The most difficult part of this build is the order of putting it together, which I will walk you through.😊
I stained the table top, just like the End Tables and the Besta media cabinets. I used a coat of Minwax Pre-Stain and a quick coat of Minwax Classic Gray and Minwax Special Walnut. Lastly, a couple of coats of Varathane Matte Clear Coat.
The back and the base pieces were leftovers from the Fireplace surround, and they were already primed. So, they just needed a quick coat of paint. That just left the 1x3 supports and the mini shelf to prime and paint.
To attach the back of the table to the top piece, I chose to Kreg-Jig them together. It really is the most secure way to attach it.
The Kreg-Jig makes the perfect pocket hole. 👍
Next, I used my corner clamps. They really help hold things together at a 90 degree angle. Then I can screw the pieces together.
Next, you are going to lay your inner supports (1x3s) with your little shelf in place. I measured mine 5" from the top. Clamp down to keep in place.
Then use your nail gun to secure the shelf in place.
While it's still clamped, flip the table over and nail gun the other side of the shelf to the back piece. The hardest part is knowing exactly where to nail. No one wants to miss fire a nail and it sticks out of the top or bottom of the shelf.
I laid a board across the back, resting it on the clamps, that are right where the shelf is. So, if I nail right under that board, I should be able to shoot the nail right into the shelf. Praying I won't miss!
And I didn't!! 😍 Then I did the same thing for the table top supports. I laid the board across, at the edge of the support board underneath, that way I would have a guide of where to nail. It worked out perfect!
Now, it's time to attach the base of the C-Table.
I first attached it with my nail gun, just to keep everything in place.
Then I pre-drilled holes for the screws and also countersunk the holes so that the screws would be flush with the base.
The last thing to do is to drill in the screws and it's done!
This piece of furniture is definitely going to get a workout!
One to pin for later! ❤️
Blessings!


Hi Lori! I just found your project! Very nice job! Super easy and inspiring. Thank you
ReplyDeleteHi! Awesome! Thanks for stopping by and reading! :)
DeleteI really love your table! Just the plans we were looking for. Thank you for sharing!
ReplyDeleteAwesome! Thank you!
Delete