*This post contains some affiliate links. Please see my full Disclosure Statement.
It's large but not too heavy and it has plenty of room for seasonal decor. I just love it! 💗
My previous mantel was so skinny there was barely enough room on there for a candle...
This is from our 2018 Cozy Christmas Home Tour
Well, I fit a candle on there, but it was always super tight and it felt like things were practically falling off of it.
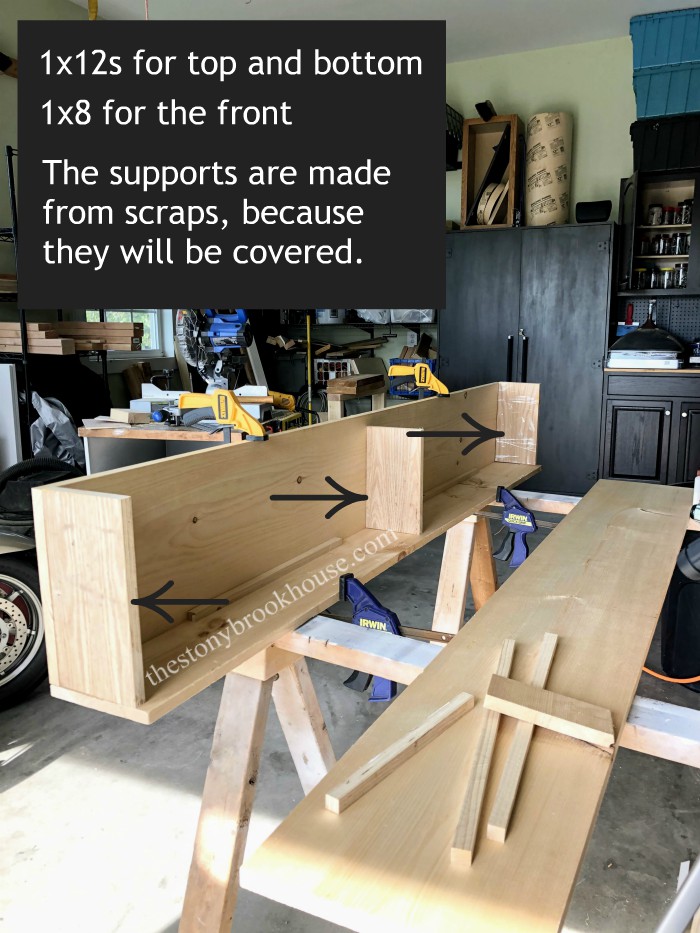
Knowing that the TV was going to be above the new mantel I wanted it super deep. We used 2 - 1x12s for the top and bottom and 1 - 1x8 for the front. This guy was nice and big!
So onto how to make this beast! First things first, I distressed the front piece (1x8) of the mantel. I didn't bother with the top and bottom, no one was going to really see that part.
These are the tools I used to distress. I clawed with the hammer, gouged with the chisel, filed with the file, dragged with the pry bar, poked with the ice pick, and slammed with the chain! Whew!!
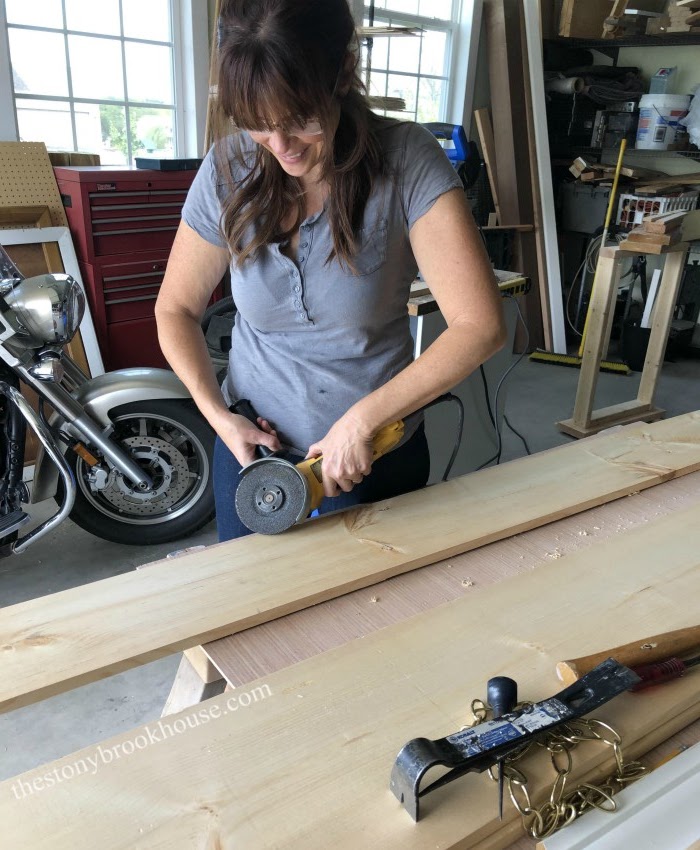
Then I took the Dewalt grinding tool and ground off some of the edges.
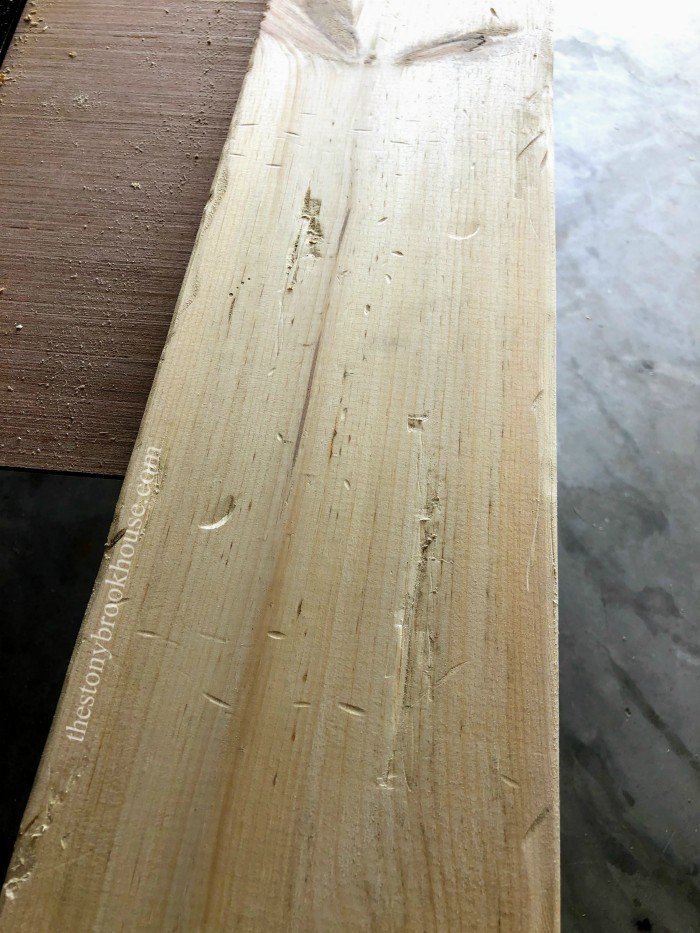
This is what it looked like after all of that. You have to be careful not to overdo it.
Next, we put the mantel together.
Basically, we glued and nailed the pieces together with our handy dandy Hitachi nail gun. (Since this project, I purchased the Ryobi Cordless nail gun and I LOVE it! Just thought you'd want to know.😊) The long skinny pieces gave support to nail it together along with the center and end pieces. I wasn't too worried what the end pieces looked like, because I have a trick up my sleeve that really takes this mantel to the next level! 👍 Then I filled all the little nail holes with filler and sanded it all down.
Boy! This mantel is a beast! Looking pretty good!!
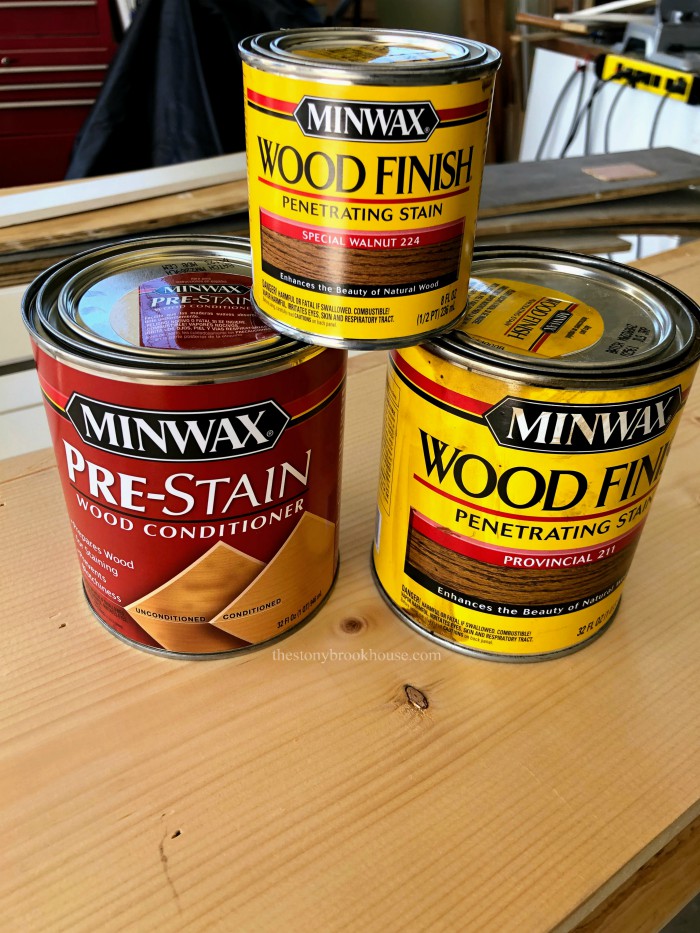
Next up, stain. I knew I wanted it to be darker. I was debating between Minwax's Provincial and Special Walnut. I went with Special Walnut. It didn't have as much red in the coloring.
But before you stain, treat the wood with Minwax's Pre-Stain. It really helps the stain go on even, not blotchy.
Here, I am putting on the 2nd coat of stain. I just love that rich brown color!
Now, here's the trick I was telling you about!
I purchased 2 Wood Adhesive Sheets.

Basically, you remove the backing and place the adhesive side onto the end of the mantel. Line it up and smooth it on. Then, using a sanding block, sand the edge where it overlaps and it will "cut" off the excess. It's super easy to use.
Then you can stain it! It gives the illusion that the mantel is a solid piece of wood. Is it perfect? No. But I don't need perfect! You'd have to get up close and personal to really notice the difference. It worked out perfect for me!! Yay! 🙌
To attach it to the wall, we screwed in some 2x4s along the wall where the mantel will set. We used scrap and left a gap for the HDMI cable to run through.
The we held it up there and screwed it in from the top of the mantel. The screws will never show and it is very secure up there! Look closely, you barely can see them.
Here's a close up of the front distressing.
I just love the way this came out!!
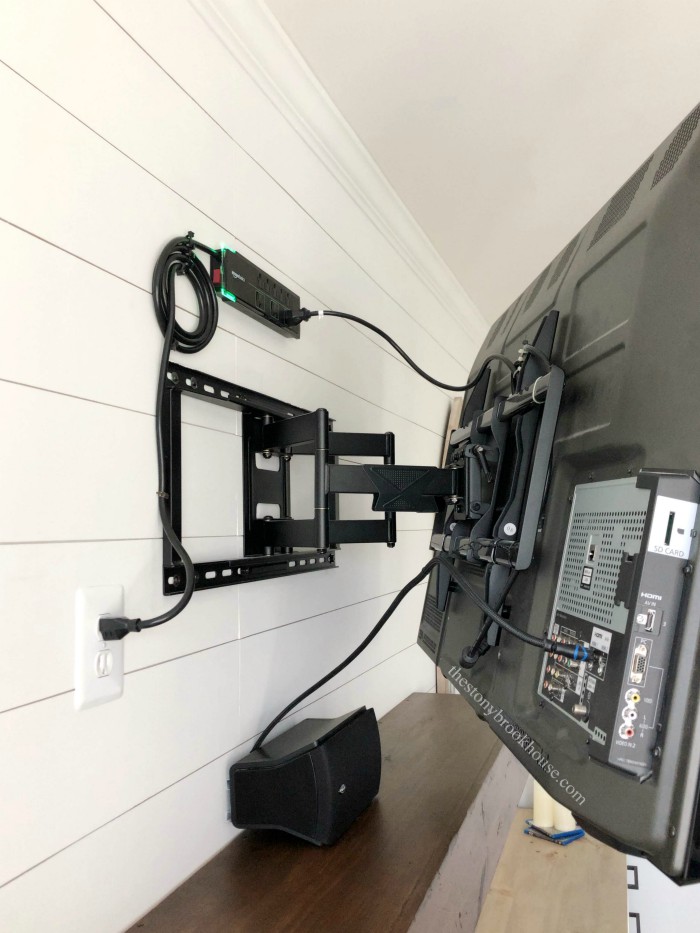
And for those interested... Here's what it looks like behind the TV. We bought a heavy duty full motion TV bracket and a new power surge. Did you know that flat screen TVs need a power surge protection of over 1400 joules? Not all power surges have the same protection.
We also ran the HDMI cable through the mantel and down one of the fireplace supports into the receiver. You can barely see the one cord from the front, behind the center channel speaker.
I am sooo happy!!! 😍
Once more to pin for later....
Blessings!








You do so many projects I wonder if you'll have time to sit in that room and watch any TV!! : ) Are you finished now with the room?
ReplyDeleteLiberty @ B4andAfters.com
Hahaha! Thanks Liberty! We are pushing to get most of the living room done before Thanksgiving... Almost done, but somethings will have to wait til next year. :)
DeleteLove this! It turned out beautiful. I'm going to be making my mantle this weekend, but my pneumatic nail gun is still in storage. Would you mind posting a link to the Hitachi Nail gun you used? The link in your blog post actually takes me to the grinder, not the nail gun. Thanks!!!
ReplyDeleteHi Apryl! Thanks so much!! Omg! I'm so sorry about the link. Just so you know that Hitachi changed their name to Metabo. I replaced the link. This is the closest nail gun I could find.
ReplyDeleteThis year I purchased a Ryobi cordless nail gun and I love it!! It doesn't require an air compressor!