Updated 8.25.22
*This post contains some affiliate links. Please see my fullDisclosure Statement.
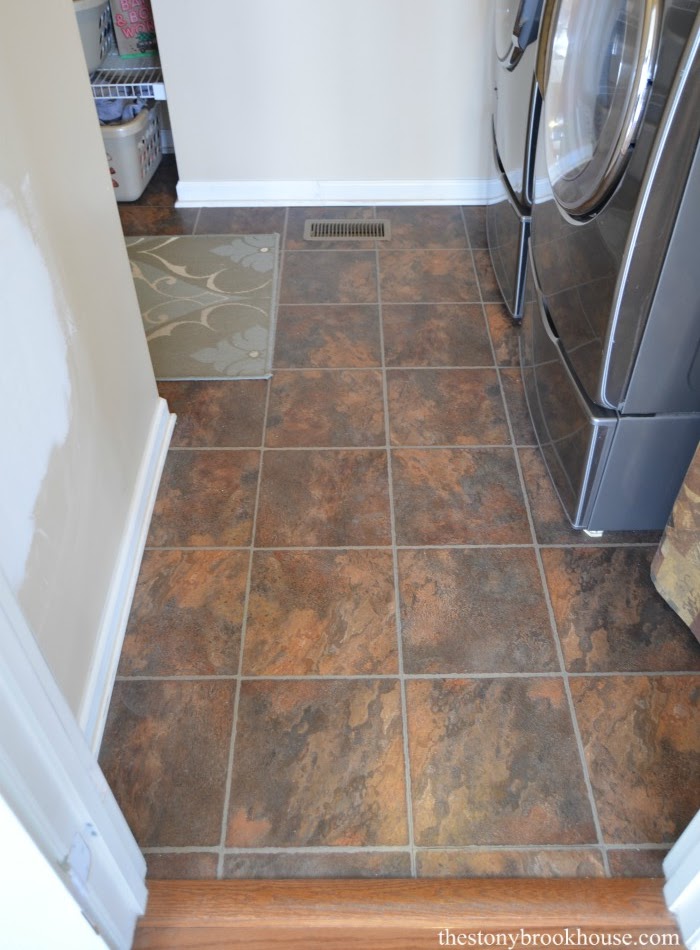
This is the floor we put in the laundry room 8 years ago. It's just plain ugly!
What were we thinking? Well, it blended well with our hardwoods. Not that we love our hardwoods... but it is what it is. I just couldn't live with this anymore!
I wasn't sure how this was going to turn out... I was pretty skeptical, but willing to take the risk.
Just a quick plug in here... If you want to watch me stenciling this floor and see the process, check out my Instagram. I have the process saved in my highlights! 😊
Here are my Pros & Cons for painting and stenciling a vinyl floor:
Pros:
1. You don't have to tear up your floor!
2. Much cheaper than replacing your floor!
3. Fairly easy to do.
4. You can customize it to your own colors.
5. It doesn't take long to finish.
2. You have to be okay with it not being perfect.
3. You can't walk on it while it's drying.
4. Lots of time spent on your knees! (Oh! did I already mention that???)😜
5. It's a risk and might not turn out like you expected.
I felt that the pros definitely outweighed the cons for me!
There was no way I was tearing up those floors.; It just wasn't in the budget.... well, unless, this turned out to be a disaster... But it didn't!! 🙌
One of my biggest concerns was putting the washer and dryer back into place... would it tear up and gouge the painted floor??? There was no way to know.... again another risk.
I'm working in my laundry/mudroom.... It's undergoing a makeover! Yay!!
If you want to see my new mudroom wall... It's gorgeous and I LOVE it! Check it out here, Farmhouse Mudroom Wall.
Here's the process I went through.
Clean that floor like you're going to eat on it! Next, tape it off. I wish I had done that first, I got the clue after I had primed it.
I used Zinnser's Bullseye 1-2-3 Primer. It's the best stuff! I rolled it on with a 4inch foam roller. It only took me about 15 minutes.
Then after that dried, another coat of primer.
That went just as quick.
I let that dry and cure overnight. I wanted to make sure this was going to stay put!
This room leads to the garage, so for the week that I was working on it, we had to use the side door to access the garage. Nobody was walking on my floor!! 😉
Okay, now, I'm going to tell you what I used to paint the floor. I would not recommend this paint. It seemed to work fine until I put the clear coat on... then we had issues... I'll cover that in a bit.
Home Depot was out of Rust-Oleum Chalked Paint in Charcoal. I should have ordered it...
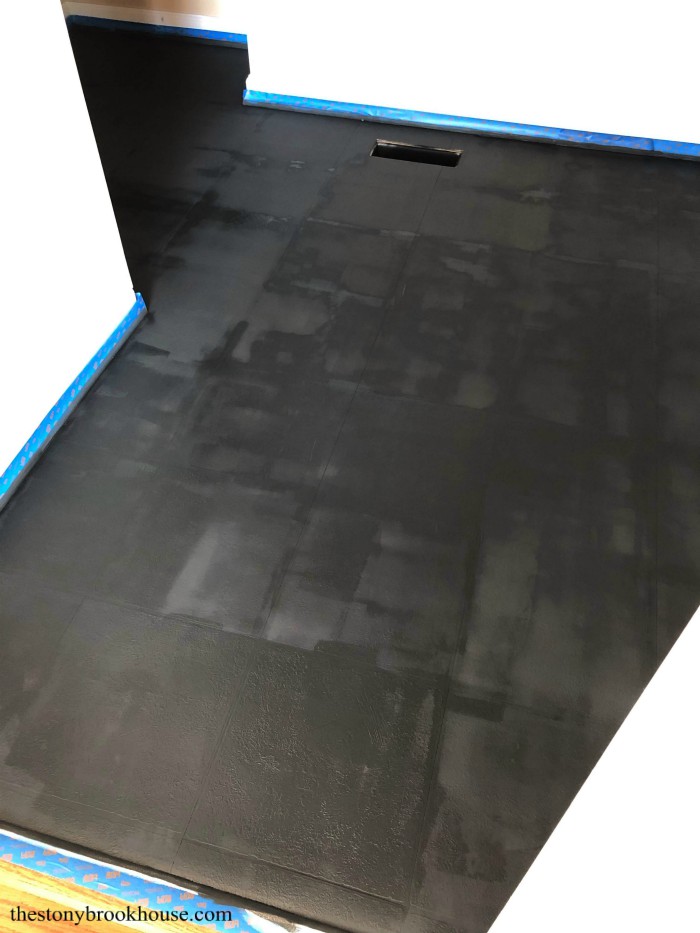
Instead, I bought Kilz Chalk Style Paint, at Walmart. I rolled it on just like the primer. It seemed to work fine. I actually expected better coverage with the chalk paint. This is after one coat.
This is 2 coats.
Definitely better coverage. It's blotchy because I took this right after I finished and some of it was still wet.
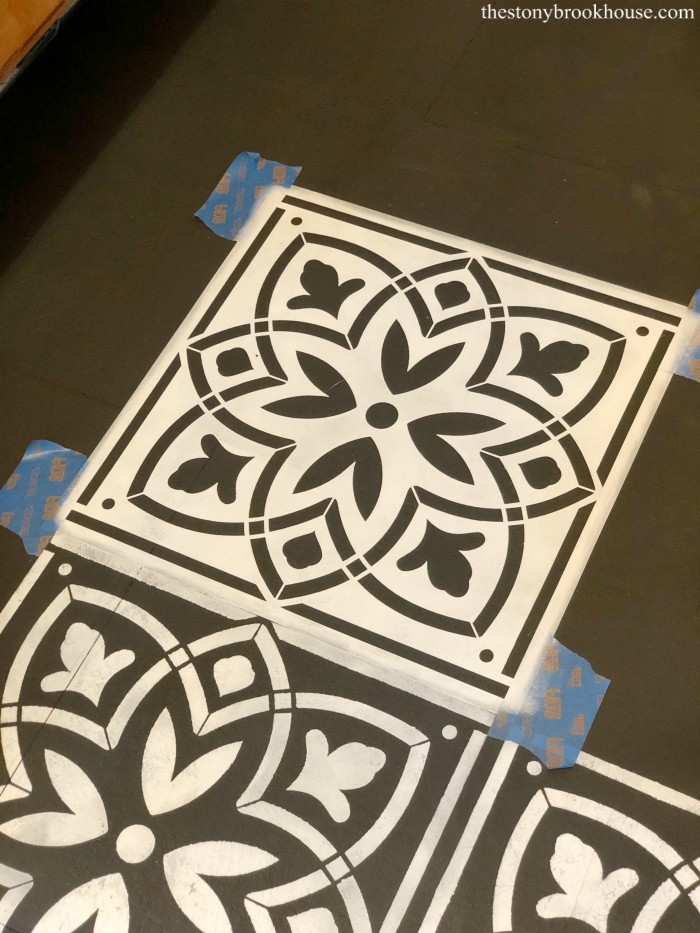
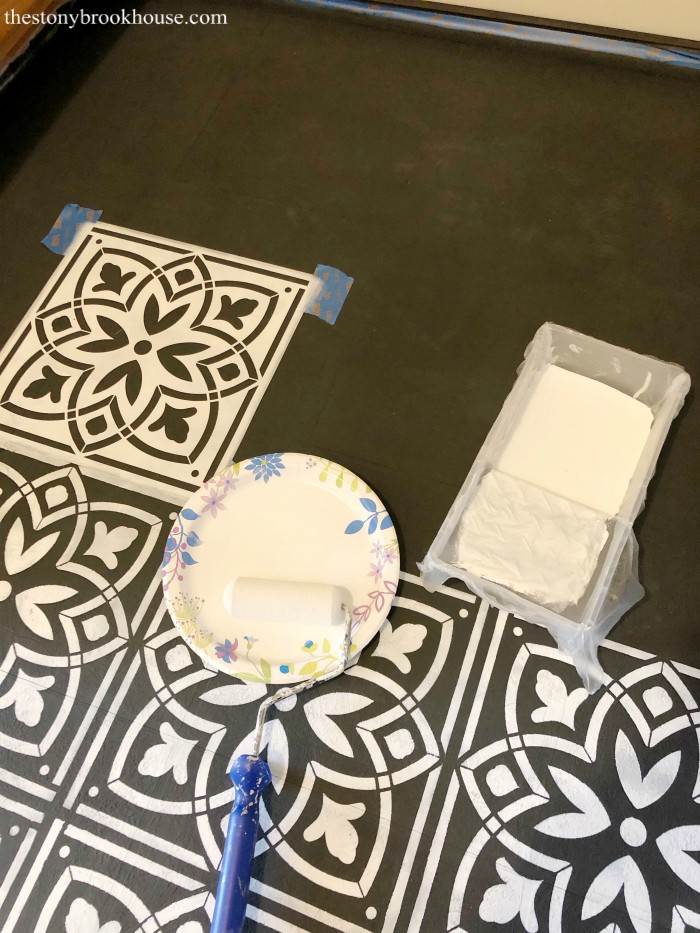
Now for the stenciling! Stenciling is not for the faint of heart. It is not hard, but it isn't super easy. I've stenciled before, you can see how beautiful it came out in our Powder Room Makeover. There is a learning curve, knowing just how much paint to keep on that roller.... Seepage is the issue. You don't want to have too much paint or it seeps under the stencil and doesn't look very pretty...
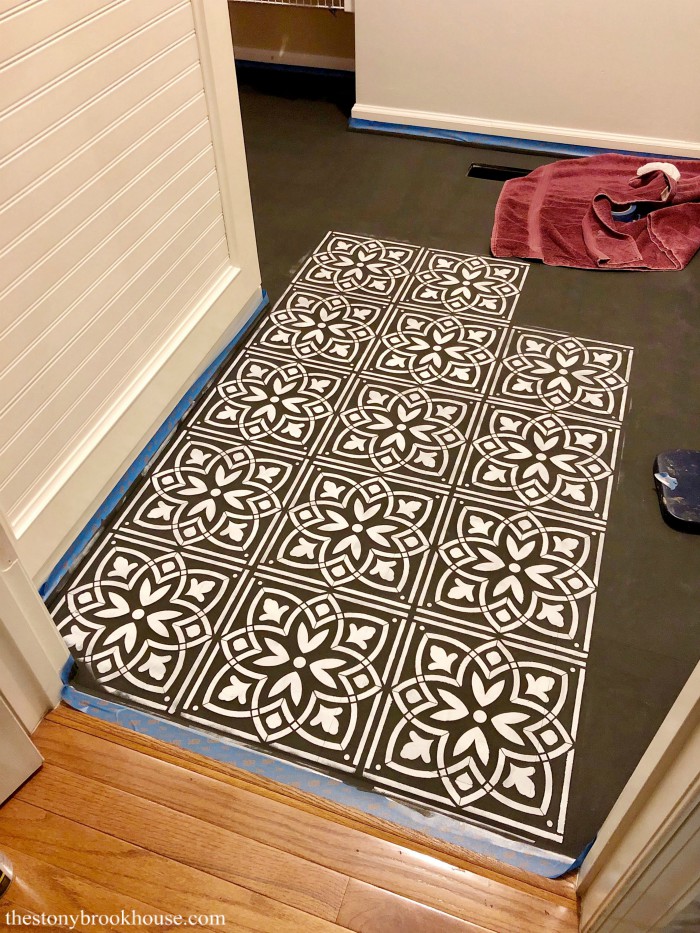
This stencil was cheap and it doesn't have extra parts to line up with the previous stencil... you just have to kinda eyeball it. Which is fine!
I'm using the Kilz Chalk Style Paint in White, and a 4in foam roller. I would roll it in a bit of paint, then used a paper plate to roll off some of the excess and then roll onto the stencil.
You have to find that sweet spot of knowing how hard to press down while rolling. I usually, started off very lightly and then went over it again with more pressure. Of course, chalk paint drys pretty quickly, so you have to watch it. Because sure enough, it will start rolling OFF some of the paint if it's already drying...😣
After I stenciled one square, I would take off the stencil and place it face down on a towel to take off some of the paint, then use it again. The stencil will get heavy with paint and seepage becomes even more of an issue.
So when my knees needed a break, I would wash the stencil and start again.
I would also go back over areas that needed a bit of touch up with a small paint brush. I even 'free handed' a couple of areas in corners and such. For the most part no one will be able to tell.
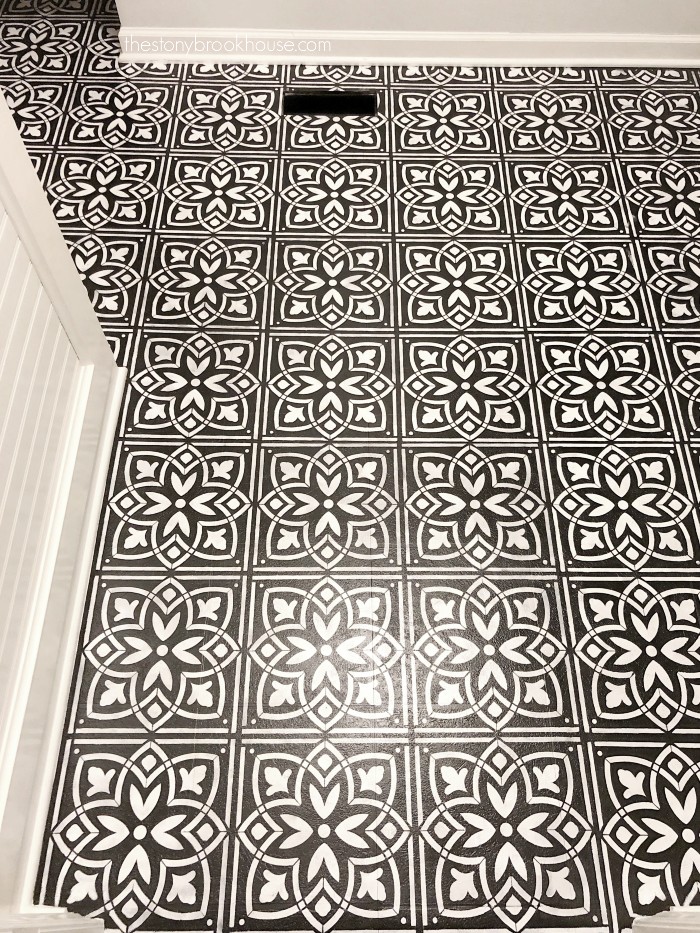
The last step, once the floor was finished stenciling, is the clear coat. This is where I had an issue...
I used Minwax Polycrylic in semi gloss. I figured I'd brush on the clear coat to seal it. Well, that didn't go so well.... It started smearing!!!! What the heck? Nooooooo! I almost started to cry! All this work and it's going to smear? It's pretty clear in this next photo. I'm grateful that it's going to be hidden under a bench that's going there.
It was dry! I know that others have sealed their chalk paint with this sealer. I've used this sealer!
But I've never used Kilz paint before.... I should have stuck with what's the best! Rust-Oleum.
I can't give up now, I have this beautiful floor that MUST be sealed! So, I thought I'd try rolling it. It was a last ditch effort, I had to try something!
It WORKED!!! Thank you, Jesus! I was praying the whole time asking God for wisdom and to help me figure this out! And He did!!
I rolled on 5 coats of clear coat. Every 2 hours, I rolled on another coat. It only took 10 minutes per coat. It's done!
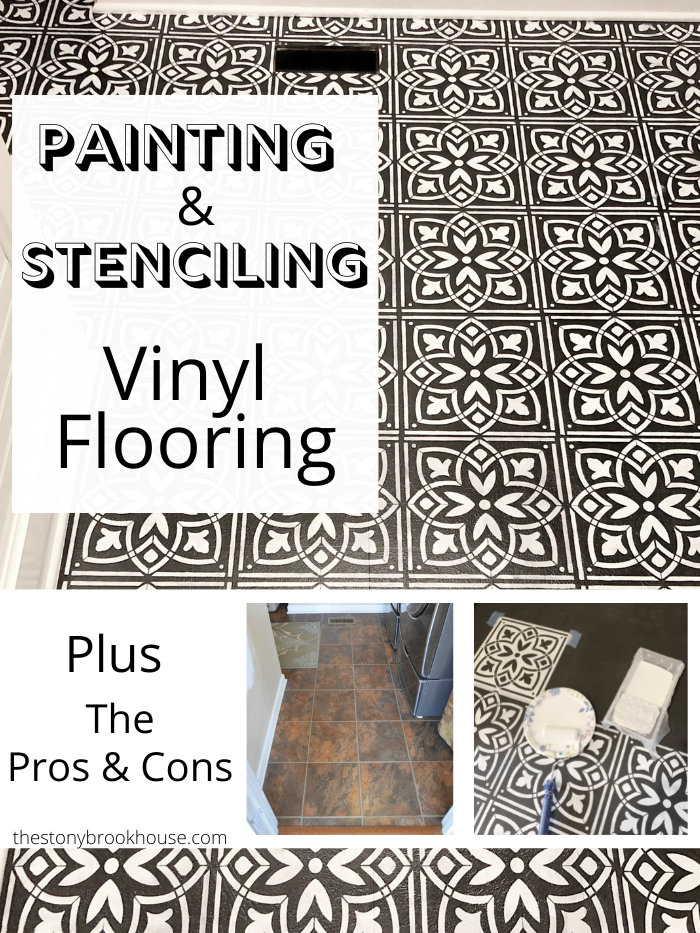
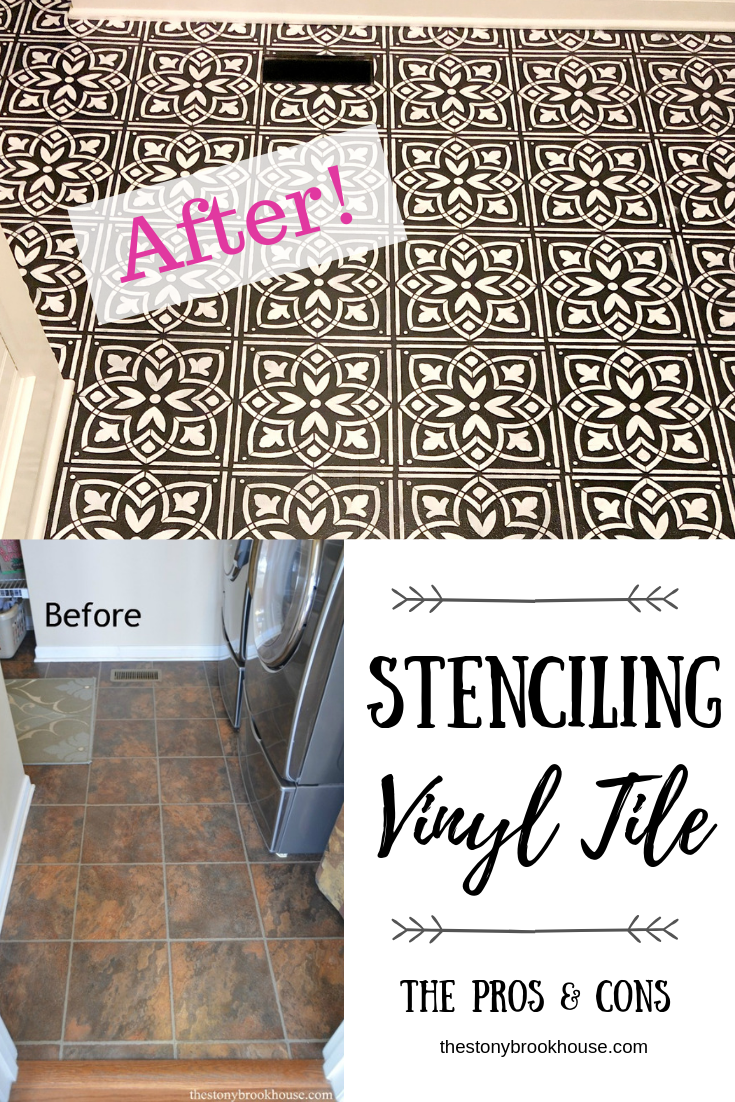
How about a before and after???
What a difference!! So, would I do it again? In a heartbeat! The pros definitely outweighed the cons. I just need to remind my knees of that! FYI... putting the washer and dryer in there didn't affect it at all! Not a scratch! 🙌
Here's an one you can pin for later~
Blessings,
Lori






I love your taste! I have icky old linoleum in my kitchen that I would love to deal with cheaply - this could be the ticket. BUT.. there are a few patches that have been torn off. Do you have any ideas if I can fill these little spots with something to even it out, first? Thanks! Thanks also for your very inspiring blog. I will be checking it out often. Cheers!
ReplyDeleteHi Mich! Thanks!! I might consider gluing in a patch of vinyl. Once it's painted it probably wouldn't show. Good luck! Thanks for reading and stopping by!
DeleteI love this. I want those stenciled tiles so bad but they are not in our budget. Do you think you could stencil on ugly ceramic tile? My laundry room and bathrooms have the same ugly tile. It all looks dirty even when its clean.
ReplyDeleteHi Jan! Yes! I think you can! If you take the steps to clean and prime. I bet it would look terrific!! Thanks for stopping by!
Deletemy daughter has a beautiful stenciled tile floor.its 2 yrs. now and not a sign of wear.
DeleteThat's awesome! Ours held up so great! I'd do it again in a heartbeat!!
DeleteI'm curious about the white paint you used with the stencil. Was the white color "solid" enough over the darker color or did the darker color bleed through the white?
ReplyDeleteI've used this same stencil in bathroom and painted floor white and using black with stencil, but would like to do the darker color for base in another room but am worried about using white over the darker color.
Hi Tracey! Yes, I definitely believe it was solid enough. The black did not 'bleed' through at all. I didn't want it perfectly solid. I wanted a bit of a worn look. But could have made it even more solid. I love the way it came out!!
Deletethank you! One more question...I'm going to be stenciling a hallway plus bathroom and laundry room off hallway. Where would you recommend I start? Hallway first or the 2 rooms off hallway? Or does it matter? I'm not sure if it's wise to make sure the stenciled tiles match up.
ReplyDeleteI'm thinking I would start with the hallway, because that's what you will see first... then you would turn into either room. Or you could start in either room, get the hang of what you're doing and then finish with the hallway once you have your 'system' down. Maybe start with the laundry room, because most likely only you and your family goes in there and if you have a couple of mistakes, it won't make that much of a difference. Just a few of my thoughts... :) Praying it turns out great! I'd love to see it! Send me a pic to my email thestonybrookhouse@gmail.com :)
DeleteI love this stencil design...What is the name/source? I'd love to use that particular design in my laundry room!
ReplyDeleteOh boy! I don't think I have that stencil anymore! I found it at Michaels. Thank you so much!
Deletewhy did you use chalk paint?
ReplyDeleteChalk paint has this great ability to adhere to just about anything. So, I felt it would be a good choice for a floor.
Delete