Updated 10.29.2021
This is what we are started with... Blah and boring...
Our bedroom is massive... I don't want to say too big, but seriously it almost is. So, we thought to break it up a bit and create a focal point. The shiplap accent wall did exactly that!
Here's the process we went through. First, of course we measured the width of it.
I wanted the accent wall to incorporate the bedside tables, so that we could install swing arm lamps in the wall. Then we found the center and marked off where all of the studs were. Once that was determined we were ready to go!
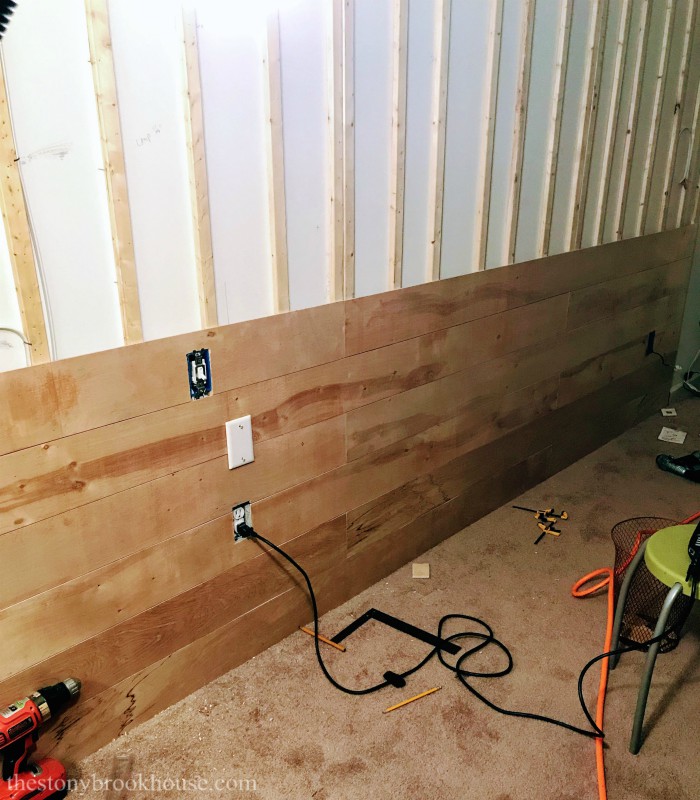
The next step was removing the baseboards and installing the furring strips. Furring strips were installed at every stud.
Furring strips are basically 1x2's. They are super cheap and you can buy them in bundles. We used them to give us space behind the shiplap to run wires.
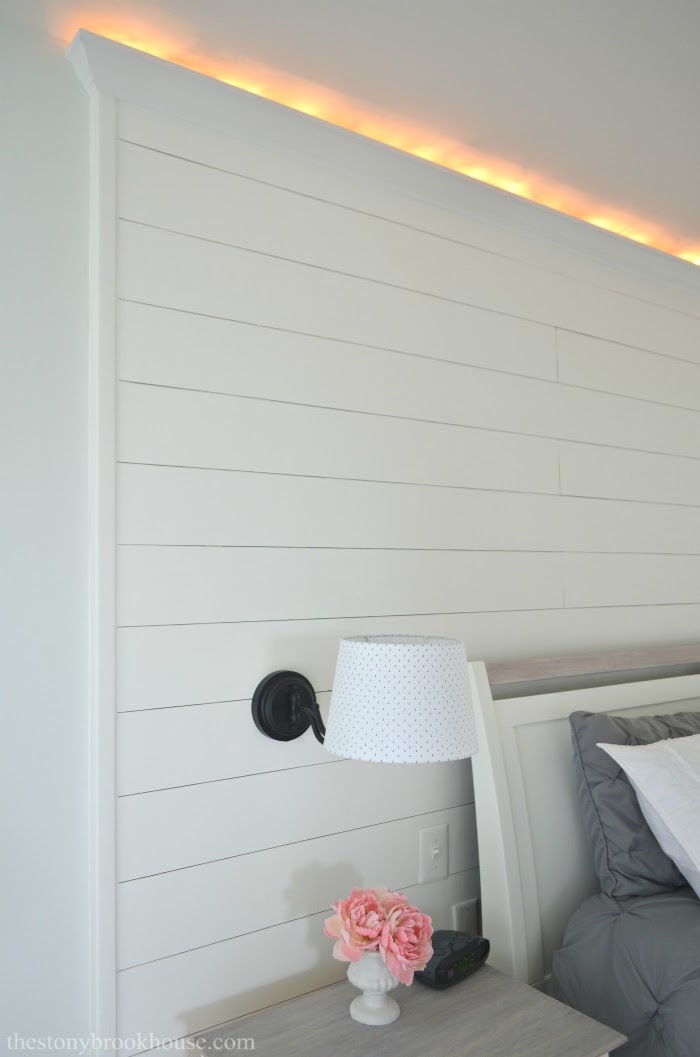
We wanted to install lamps on either side of the bed and also have mood lighting up inside the crown molding. The mood lighting was hubby's idea. I wasn't too keen on the idea at first, but just wait til you see it! I was so wrong, I love it now!!
Next, hubby worked on the electrical. He added 2 lights, an outlet for lights in the crown molding and a switch to easily turn on and off the crown molding lights. Pretty smart, right?!
Now the fun part!! Shiplap!
Our shiplap is made from a 4x8 sheet of underlayment. We purchased it at Home Depot for around $14 each. Lowes also carries underlayment for pretty much the same price, but won't cut it into small strips.
We had Home Depot cut the underlayment into 6 inch strips. We prefer cutting it ourselves. Our saw blade is sharper and we take our time. They just come out cleaner and nicer. But we were in the middle of winter and it is FREEZING in our garage, so we had Home Depot cut them. I just had to sand the edges a bit more than normal.
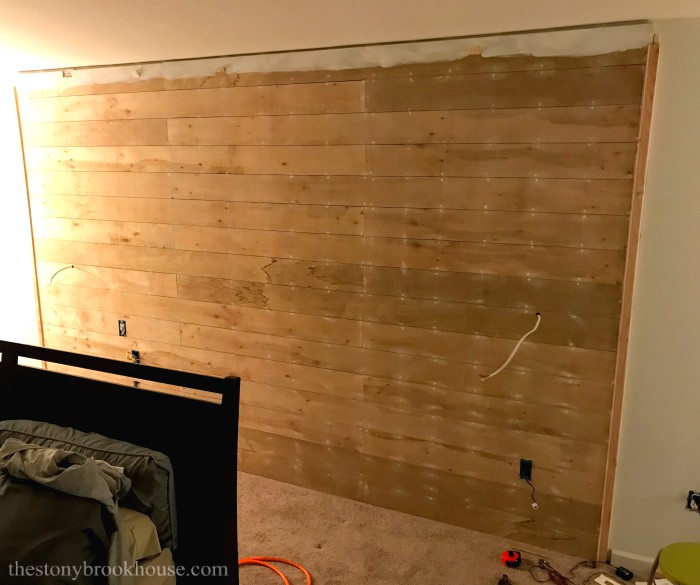
I cut the some of the strips in half, so we could stagger the pieces on the wall. Then we just nailed them up with our nail gun. Seriously, the best purchase we've made! Along with our air compressor on wheels!
We used washers as our spacers. We didn't want too wide of a space, because you could see the shadow of the furring strips, so we tried to make it as small as possible.
It worked out perfect. Then we added in a few supports for the crown molding.
Next up, install crown molding and add some sort of strip to the sides to cover the ends.
Hubby had another genius idea for the ends. He took a 2x4 and cut it lengthwise. Then cut off the 'curved' part of the 2x4. So, he was left with about a 2 - 1 1/4 x 1 3/4 x 8 pieces. He then cut a very small rectangle out of the center so that he was left with a piece that has a right angle to cover over the edge of shiplap wall. Basically, a corner piece, but measured to fit our corner exactly. 👍
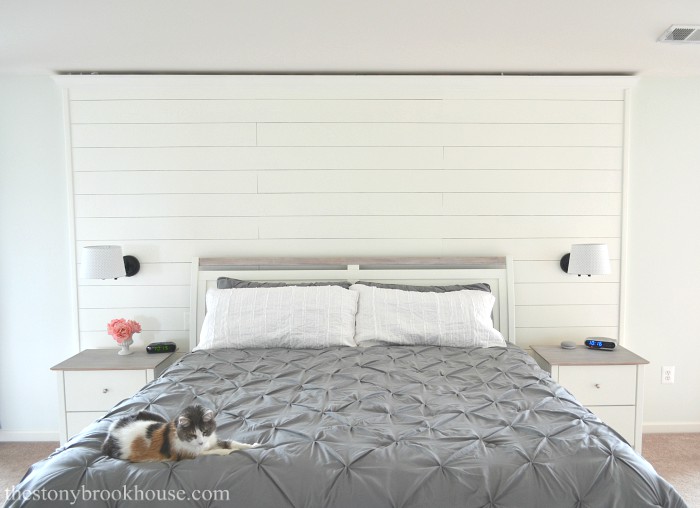
I filled all nail holes and did some caulking along the sides and crown molding. Then a few coats of primer and paint! Voilé!! 🙌
OMG!! I love love love it!!!
The swing arm lamps are sooo cute AND old! We had them in our old house. I just spray painted them to freshen them up and added new shades.
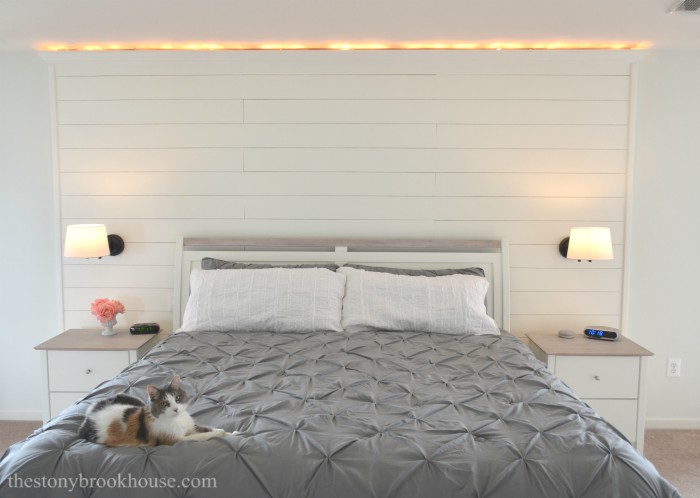
Here are all the lights on... The lights inside the crown molding are just Christmas lights we plugged in!
I know that I wasn't to hip on the idea at first.... but now I LOVE them!
I actually turn them on when my alarm goes off in the morning. It's a soft and peaceful light to wake up to. 😊
Let's do a quick before and after... 😍
It's all done! What a difference!! All the furniture that needed painting in our room is complete. Now, I can start decorating. Decorating really isn't one of my strengths... but I have some ideas I think you all are going to love!!
Here's a 'pin for later' photo.
Update! Here's a link to the finished Master Bedroom Makeover!
Blessings,
Lori







So there's carpet underlay thats thicker than strip flooring underlay. Do you know the thickness you used on doors pls?
ReplyDeleteThe only underlayment that our stores sell here is 1/4" underlayment. I didn't know there were others.
Delete