What a transformation! I thought it would look good. But this looks awesome, amazing, fantastic and terrific!
*This post contains some affiliate links. Please see my full Disclosure Statement.
I am absolutely in LOVE with how this dresser came out! It's like a breath of fresh air...
It was so much easier than I thought it would be. The most effort I had to put in, was in stripping the varnish off the top, but after that it was a breeze!
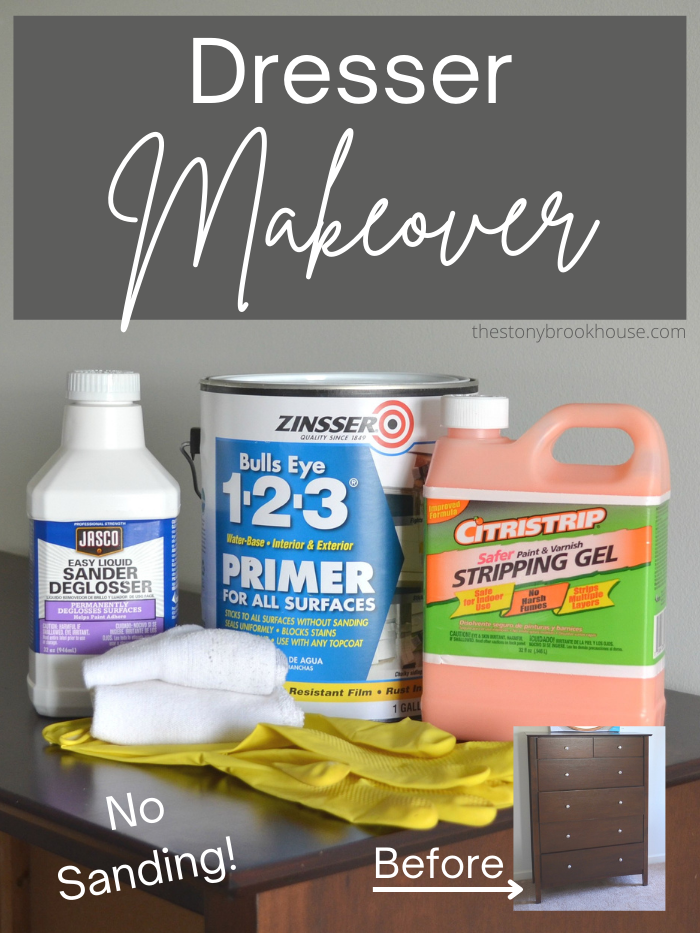
The varnish stripper I used was Citristrip Stripping Gel. What's nice about this gel, is that you can use it indoors. There was no way I was going to drag this dresser and drawers downstairs and into the garage. Besides we are in the middle of WINTER 😣 and it is FREEZING in the garage.
It's pretty simple to use, just brush it on and wait the allotted time.
Next, you will need a scraper, to scrap it all off. Quite a bit came off, but I wasn't done. I did another coat and stripped that.
It still wasn't as light as I wanted it... so I read on the bottle that you can apply some with a scrub brush. Hmmm.... I gave it a go. So, I scrubbed and wiped it up with an old sock. That got quite a bit of the stain out. Yay! (Of course, I forgot to take any photos of that part... I get so involved in the project that I forget to whip out my camera and snap away... sorry)
So, with the top 'done' for now, I moved on the the body of the dresser. This is real life here... Enjoying my mess? 😉
Have any of you ever used Liquid Sander Deglosser?
I was a bit skeptical.... With this product you aren't supposed to have to sand. What??!! Not sand? If this product works, it will be a lifesaver!! So, I gave it a go.... and...
It was SUPER easy to use! Basically, you just wipe it on. I used an old sock. Let it dry and then start painting. Really??? It dried in about 10 minutes. I started priming the drawer fronts, just to see if it would hold up to it's claim. Of course I used my favorite primer, Zinsser Bulls Eye 1-2-3 Primer. The proof will be if it passes the scratch test in the morning...
It passed the scratch test!! What???!!! No more sanding??? My scratch test is basically just scratching the primed surface with my nail and see if the paint comes off. It made marks, but the primer didn't come off.
Yay!! 👍 😊 So, one more coat of primer and then we are off painting. In hindsight, I think I should've put 3 coats of primer and 2 coats of paint. It's just sooo difficult to cover dark pieces to make them completely solid white. Difficult... not impossible!
So, let's take another long look at the before photo... plain, dark, dreary, boring.... poor dresser 😒
Now, take a look at this beauty!! 😍 🙌
GAH!!! What a transformation!! 💕💕
The paint color is Simply White by Sherwin Williams. I just had Home Depot mix Behr paint with the Sherwin Williams color. 👍 I am so in love. I can't stop looking at it.
The only other thing I did was dry brush the top with a bit of the Simply White paint.
What do I mean by 'dry brush'? It's very easy and adds just a touch of a 'weathered' look. Take a clean and dry brush and dab it into a bit of paint. Then pounce that brush on a paper towel or paper plate to get most of the paint out. Next, you brush it on to your surface. You have to brush it in kind of hard. You'll get the technique. Just start with as little paint as possible on your brush, you can always go back and add more. 😊
When I finish the other dresser, I will seal the tops with a clear coat.
I just can't get over the difference!
I'm really loving the rose gold mirror... That will be mounted to the wall eventually.
One more look at the before and after...
What a difference!!
Thanks for reading!
Blessings,
Lori


Love it. It looks totally amazing.
ReplyDeleteThank you sooo much, Marty!
DeleteLove the dresser after it was painted and the top of it looked fantastic! I have used the same stripper that you used and I loved it. It works great for indoors projects.
ReplyDeleteHi Judy! Thank you! I'm soooo happy with how it came out! I've now finished the rest and am "IN LOVE"!! The stripper worked really well for me. It's a bit of a learning curve... but I'm so glad I did it!
Delete